Microsoft OAuth
Microsoft OAuth Setup for Unipile
By default, your integration uses Unipile’s OAuth credentials. If you want a full white-label experience when end users connect their Microsoft account from your app, you need to create and use your own Microsoft OAuth credentials by create your app in Microsoft Entra ID. This is optional and requires extra setup.
Create Your Free Microsoft Entra ID Account
If you don't already have one, create your free Microsoft Entra ID account. You will use this account to create the Microsoft developer application used for authenticating end-users via OAuth with Unipile.
Creating an App Registration
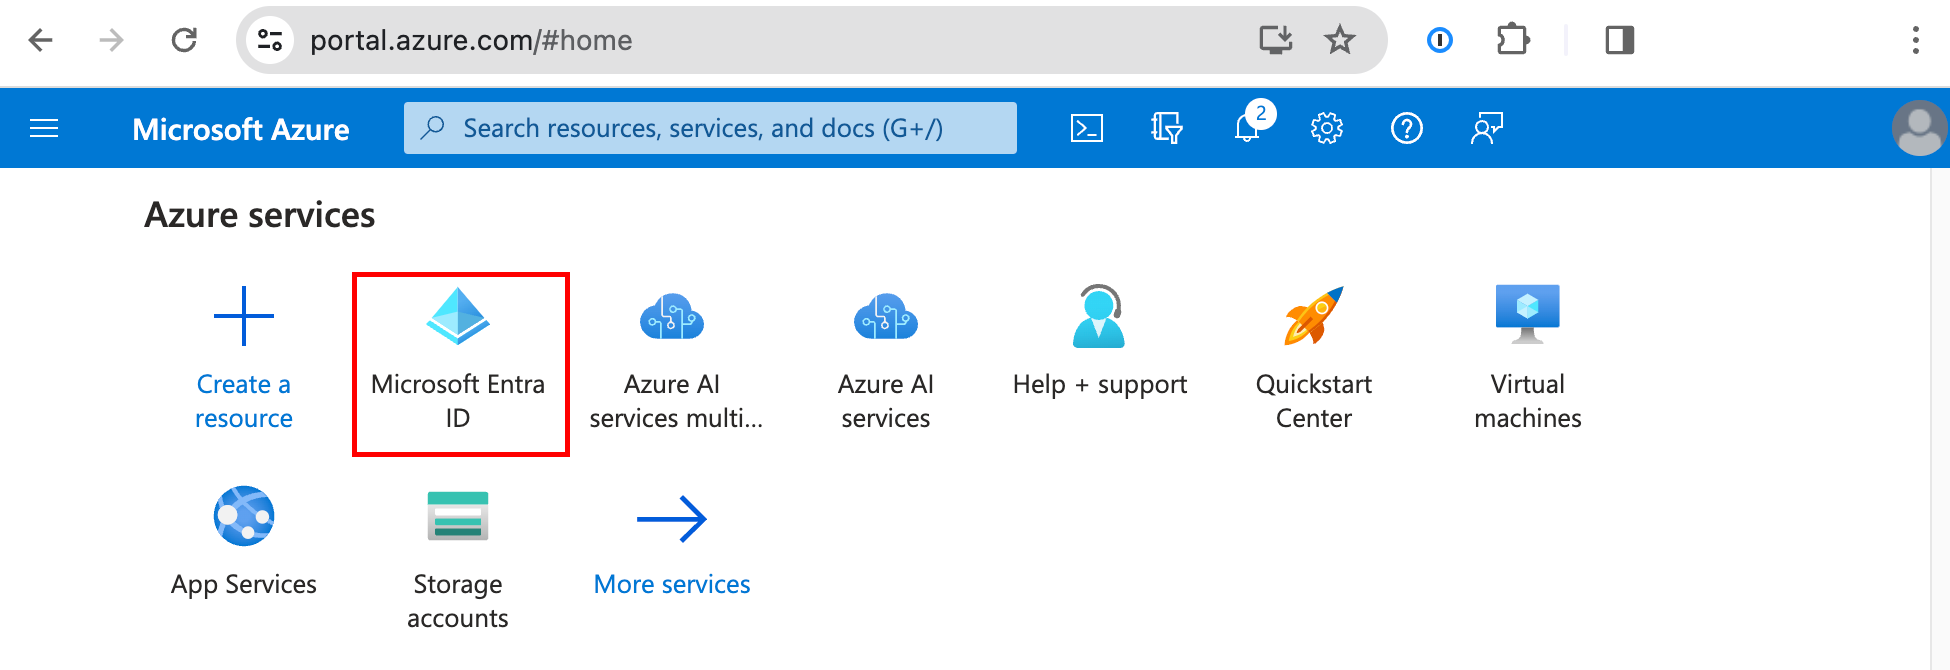
- Log in to https://portal.azure.com and go to the Microsoft Entra ID (previously Azure Active Directory) service.
- Click on "New registration".
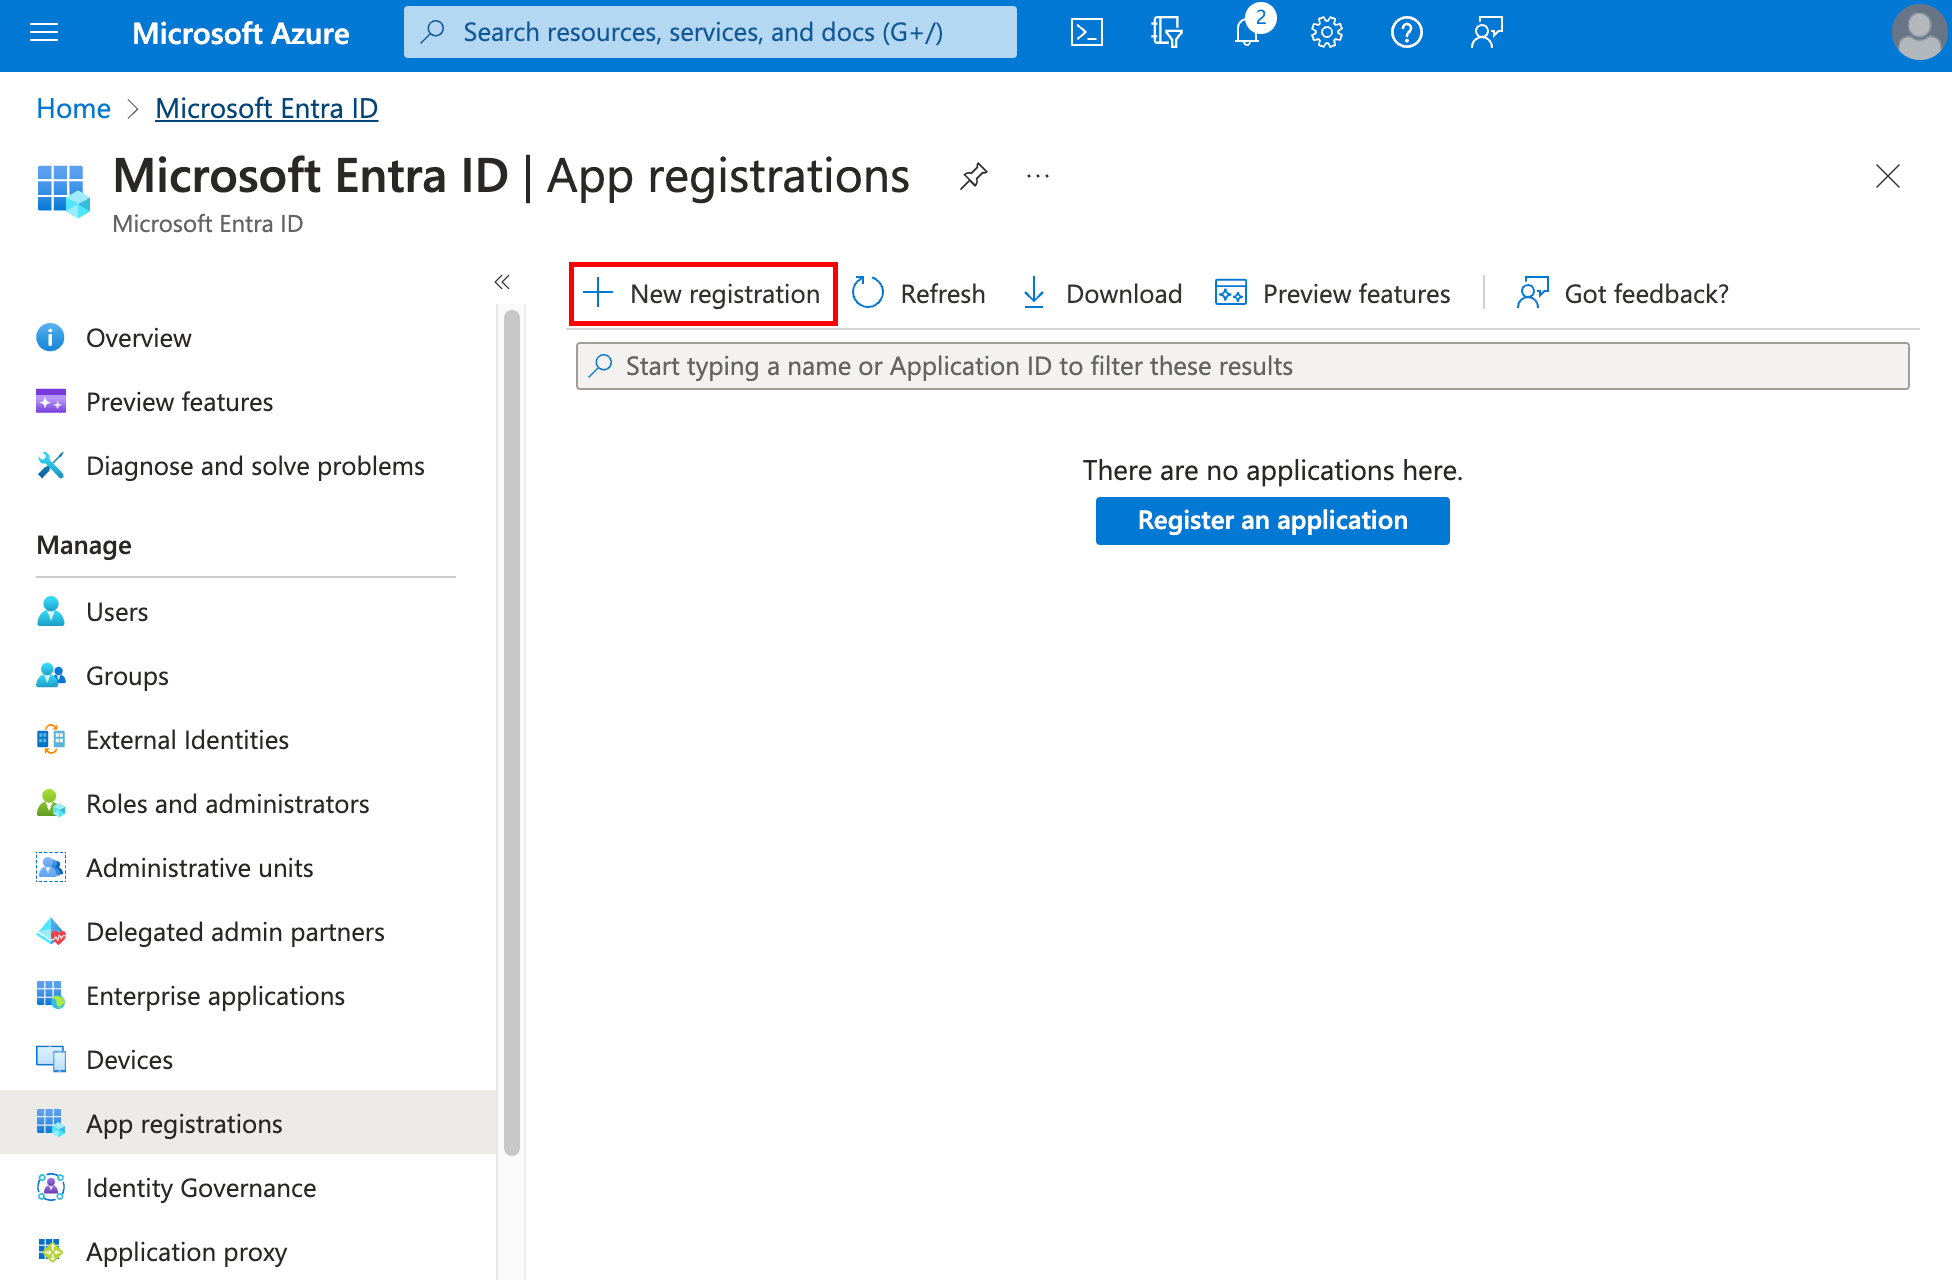
- You will be presented with the following screen:
- Name your app (this name will be visible to customers).
- Set the audience for this app to the second option "Accounts in any organizational directory (Any Microsoft Entra ID - Multitenant) and personal Microsoft accounts (e. g. Skype, Xbox)" to be able to log in to any Office 365 account (business and personal).
Specifying Redirect URI
Head to the "Authentification" panel and click "Add Uri" on Web part. You need to add 2 URL :
- https://{{YOUR_DSN}}/api/v1/hosted/microsoft_auth_request_callback (you can find your DSN in top right of Unipile Dashboard, example https://api1.unipile.com:13211/api/v1/hosted/microsoft_auth_request_callback
- https://{{YOUR_DSN less port}}/api/v1/hosted/microsoft_auth_request_callback/port{{YOUR_DSN less domain}} (you can find your DSN in top right of Unipile Dashboard, example https://api1.unipile.com/api/v1/hosted/microsoft_auth_request_callback/port13211
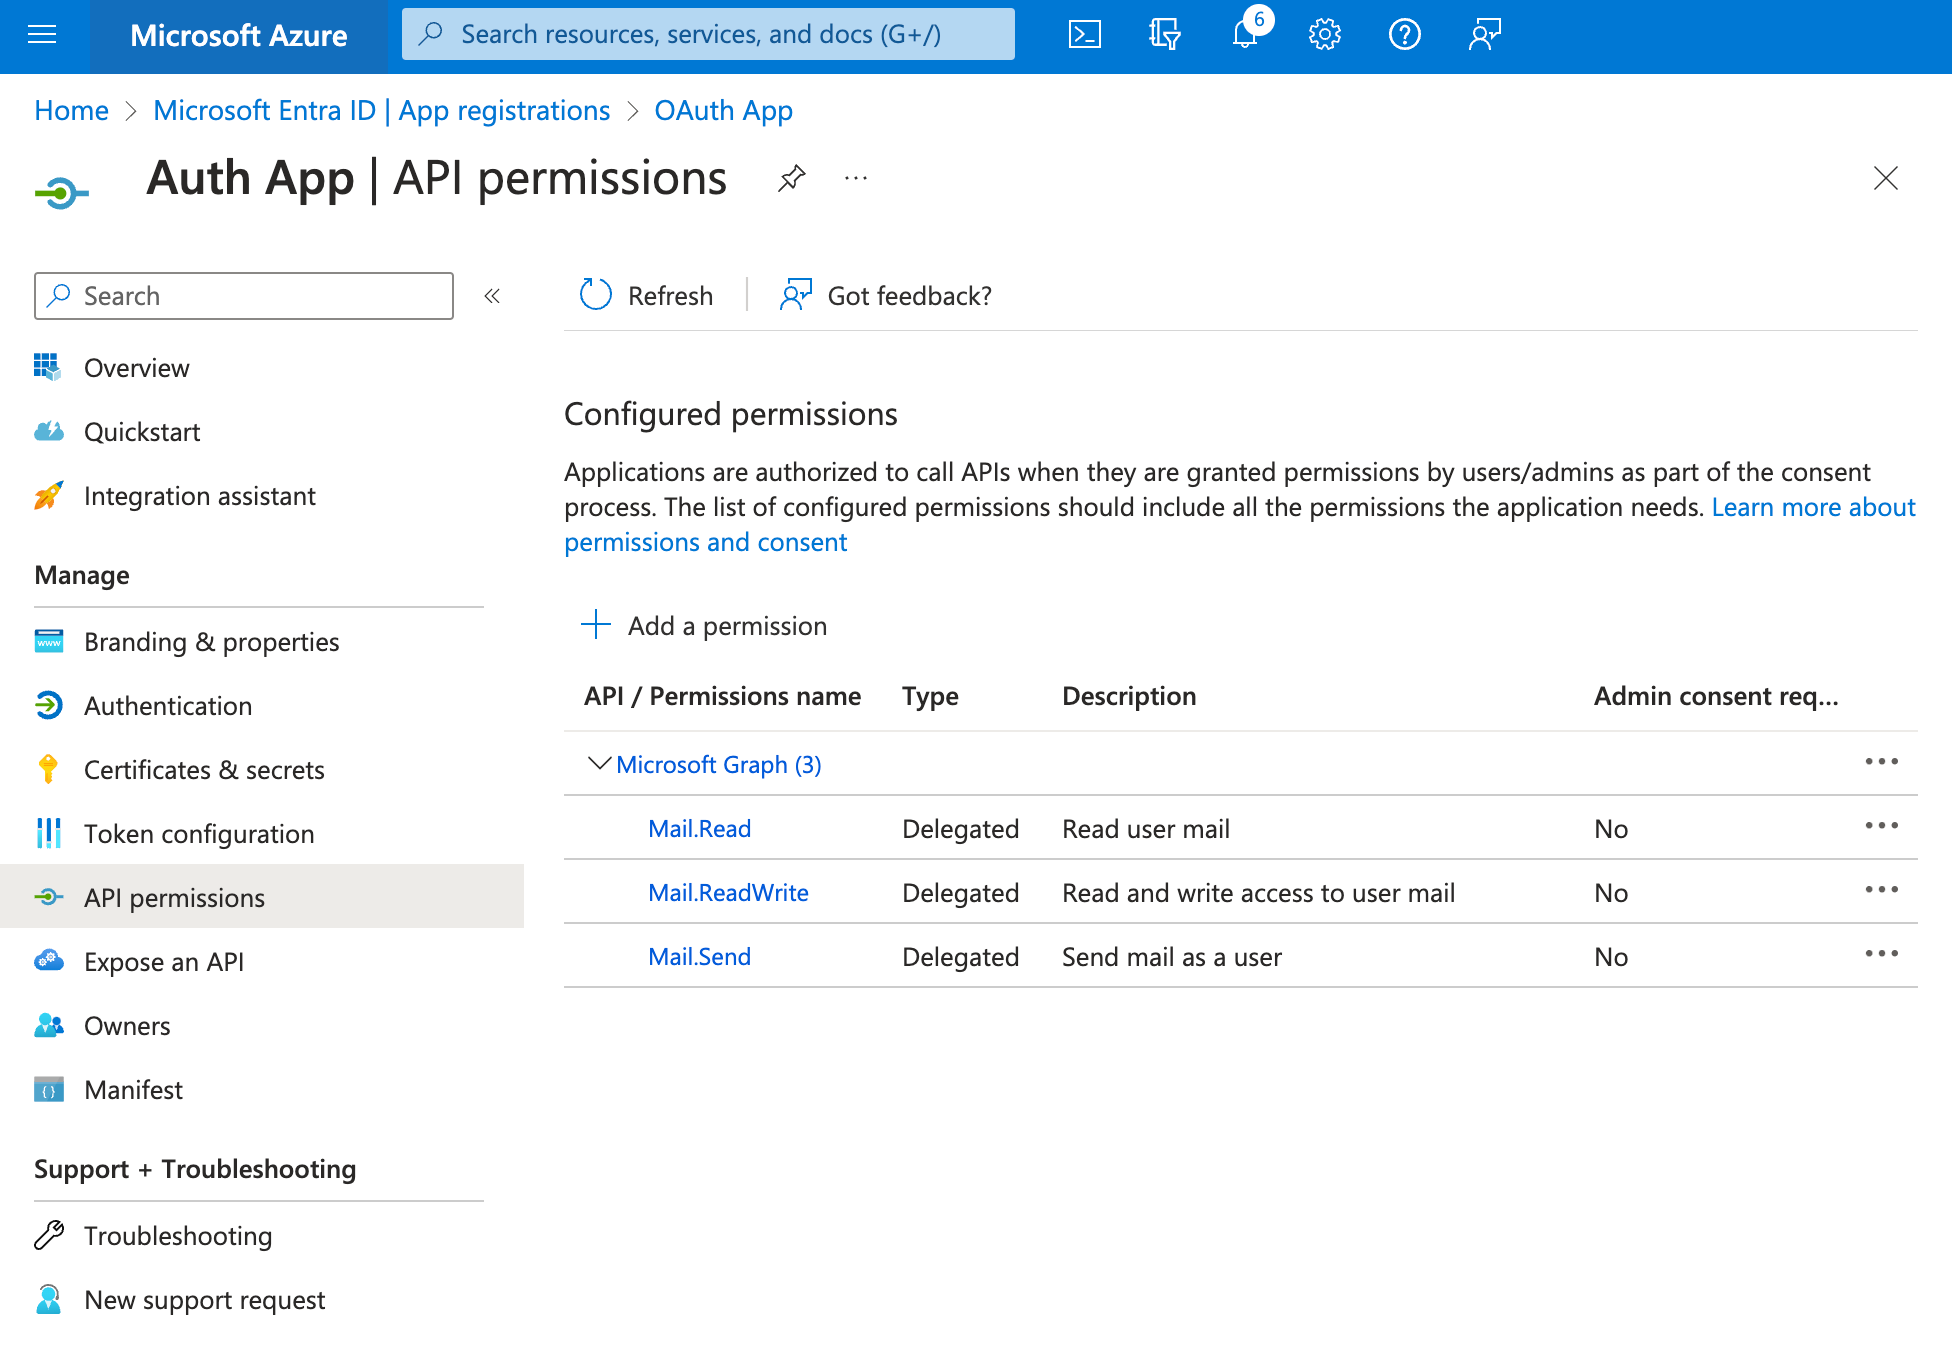
Specifying API Permissions
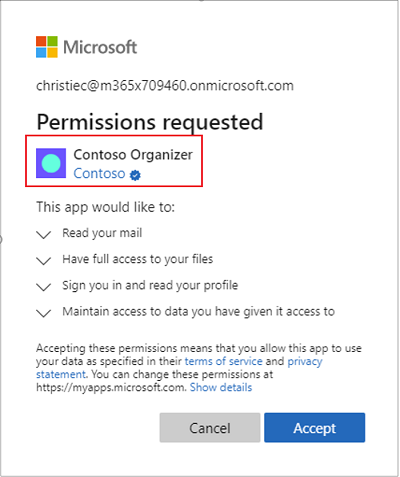
Ensure your app has the correct API permissions:
- Head to the "API permissions" panel and click "Add a permission".
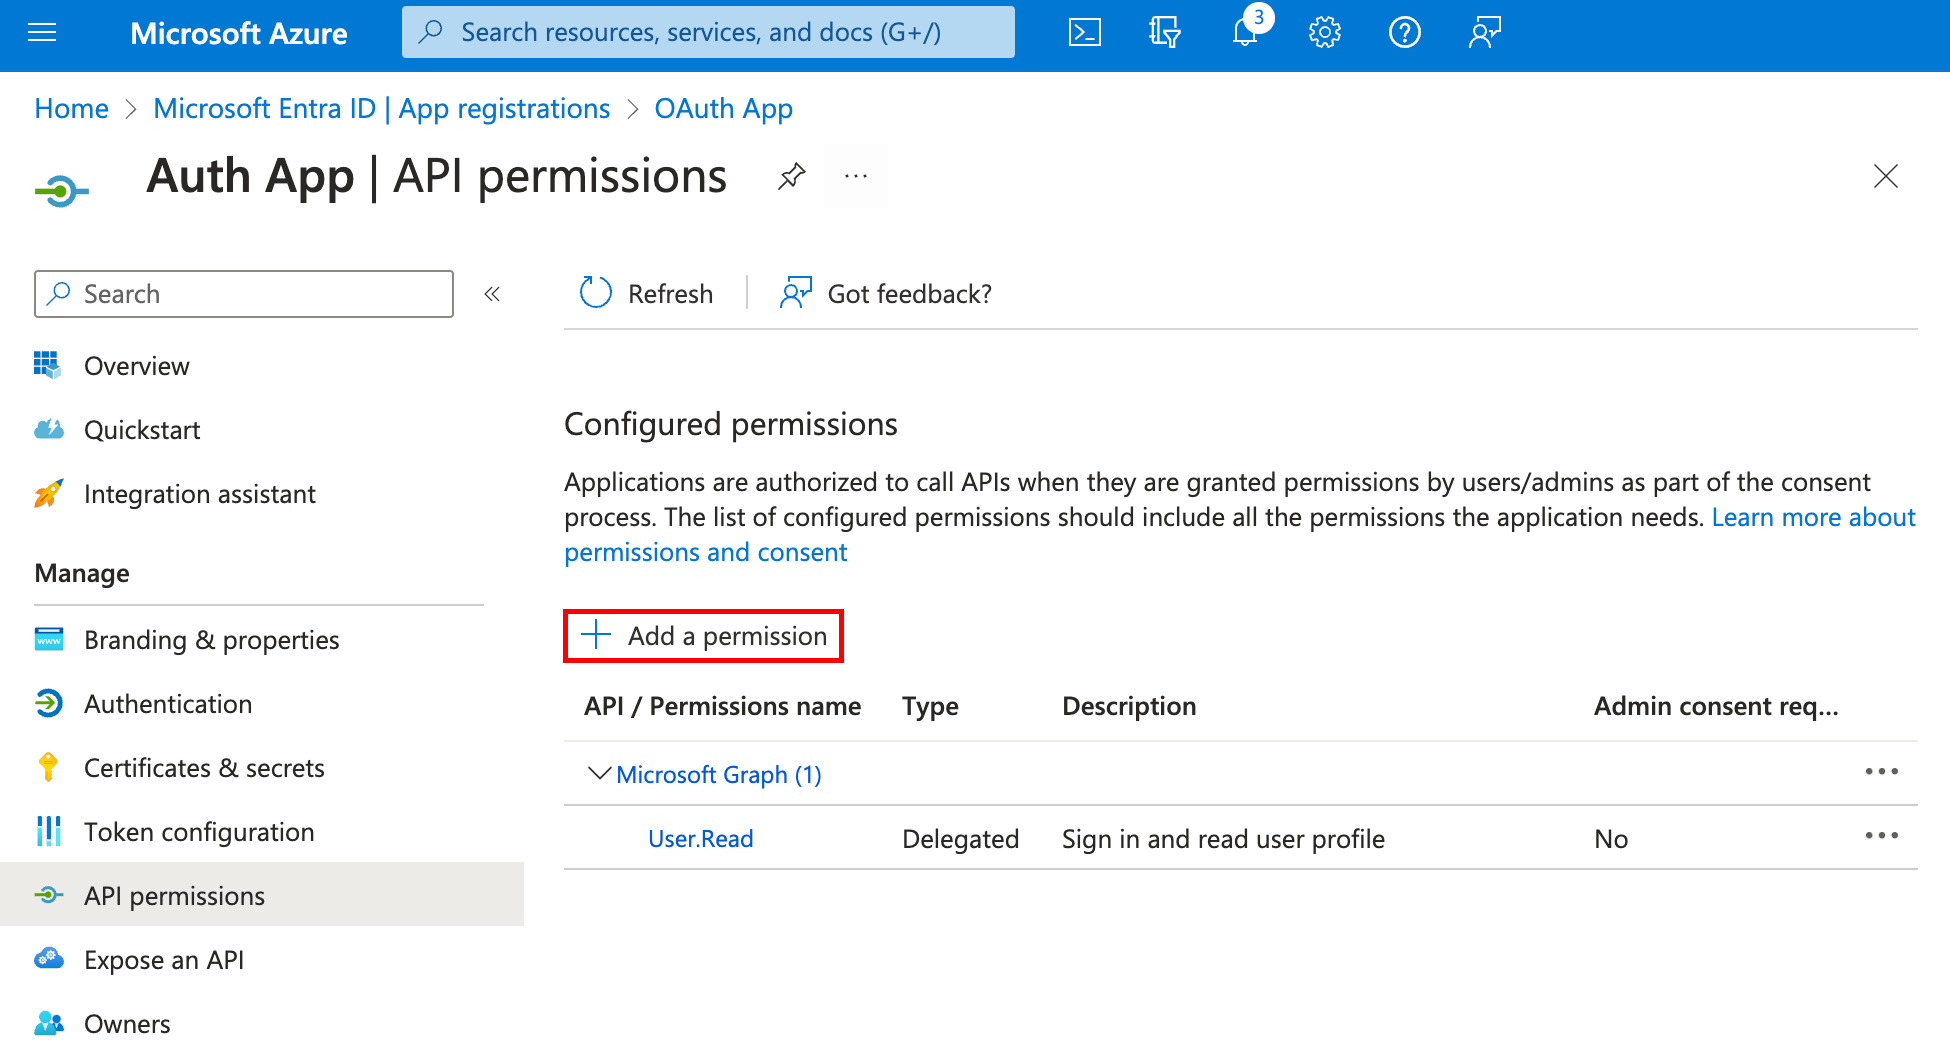
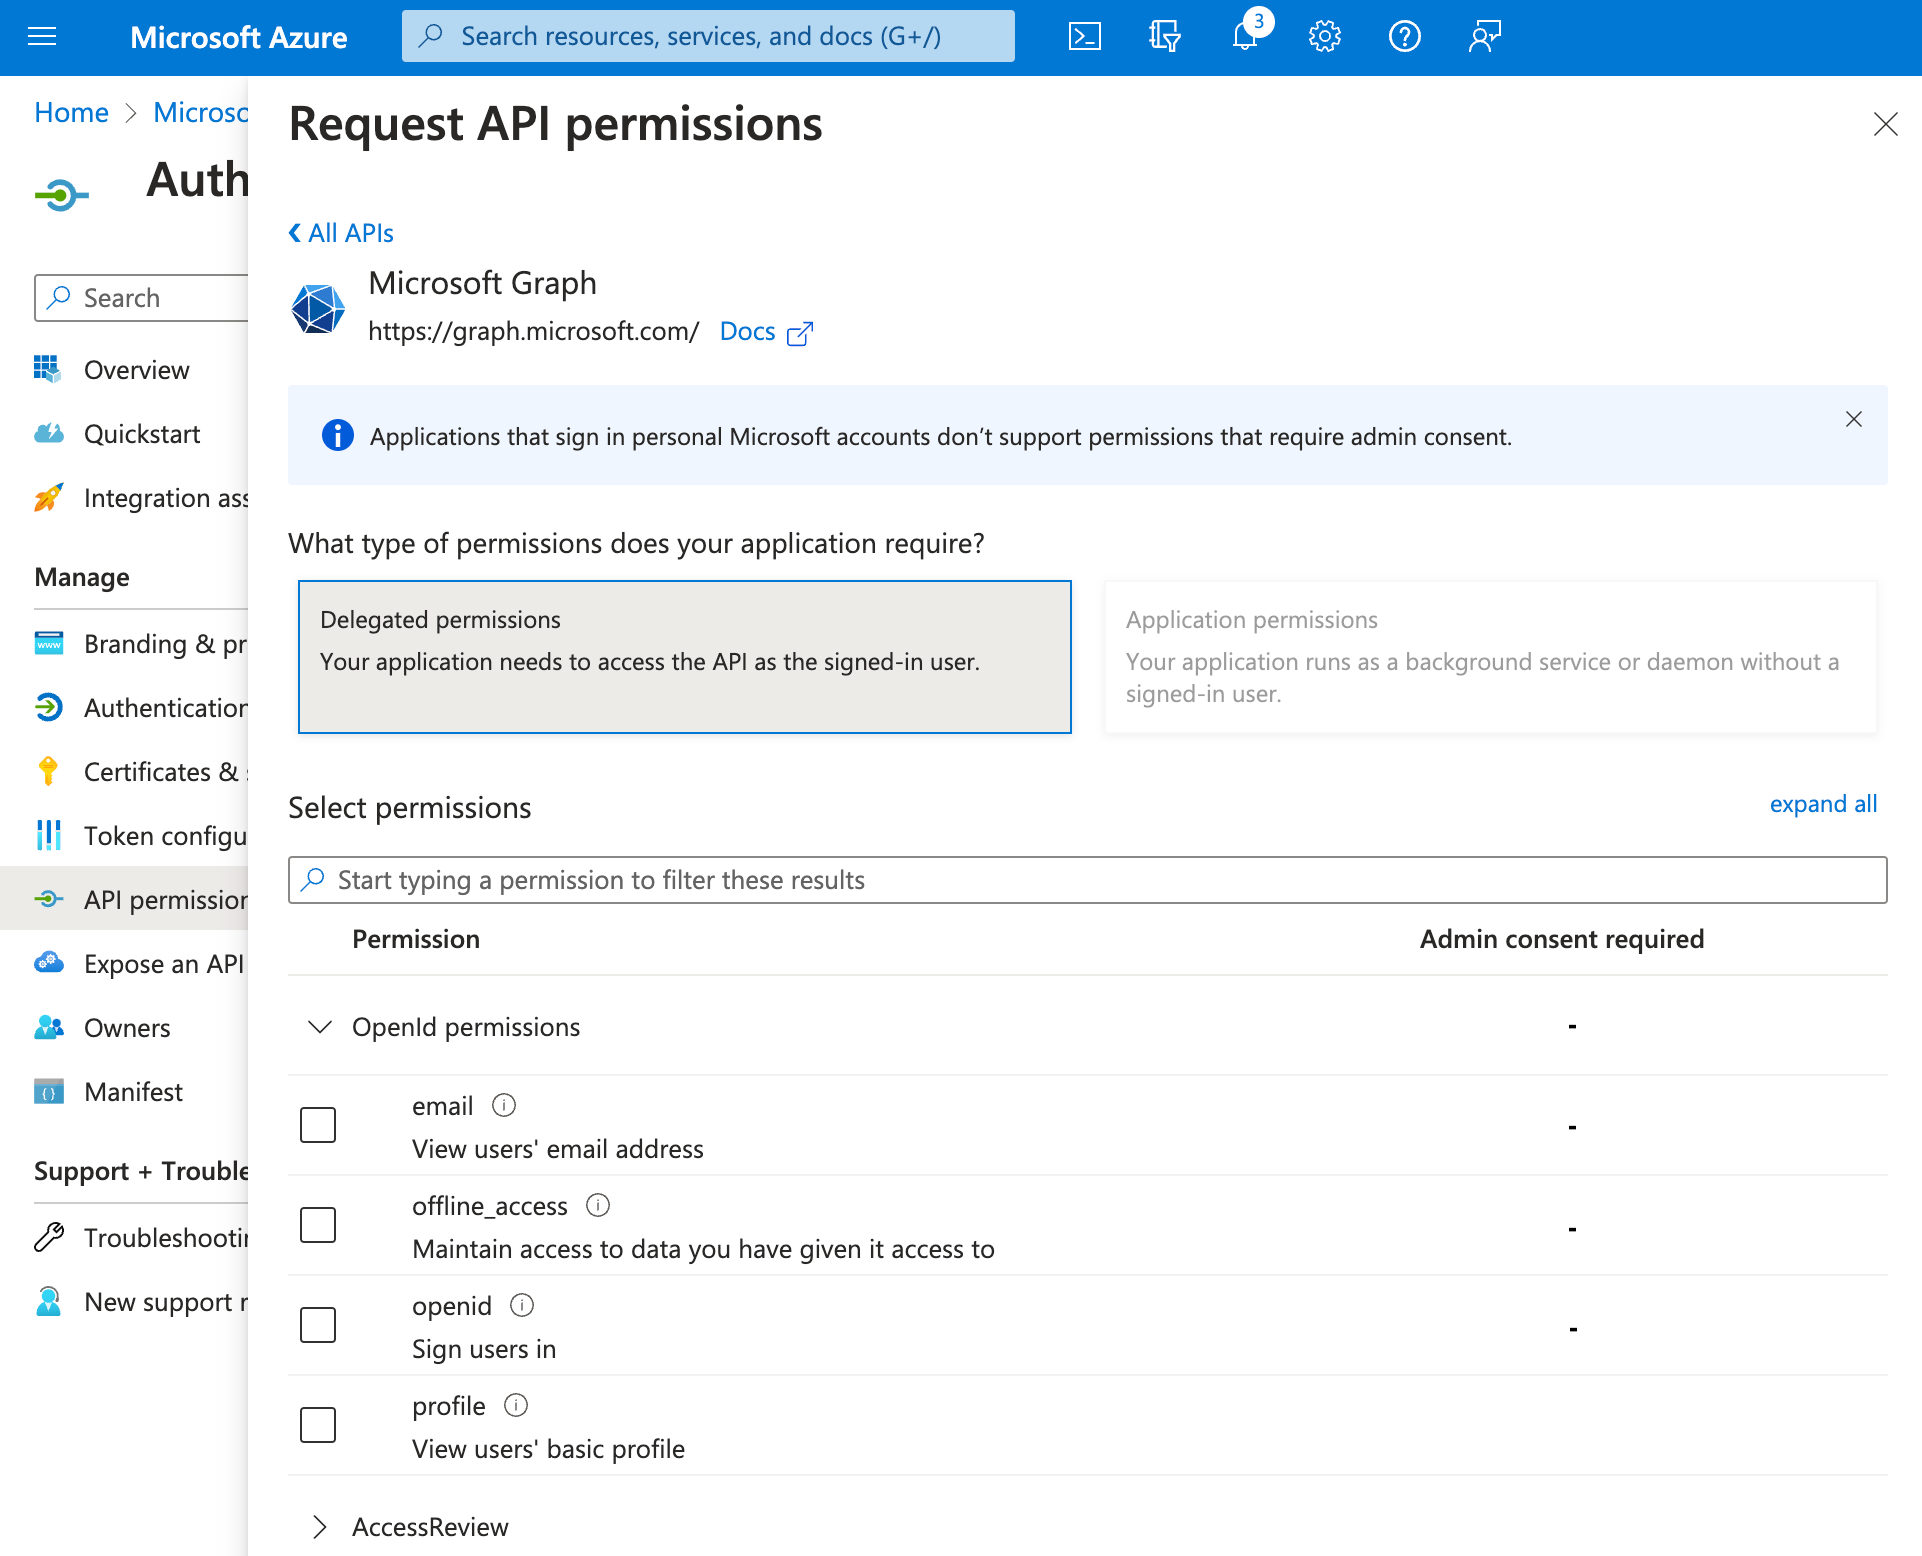
- Choose the Microsoft Graph set of permissions.

- Then add all required Delegated permissions: Mail.ReadWrite, Mail.Send, Mail.Read
This is what your application permissions screen should look like.
- To use the Calendar feature, you will need the following scopes too :
Calendars.ReadWrite
Calendars.Read
Calendars.Read.Shared
Calendars.ReadWrite.Shared
You will need to add them in your dashboard scopes settings too.
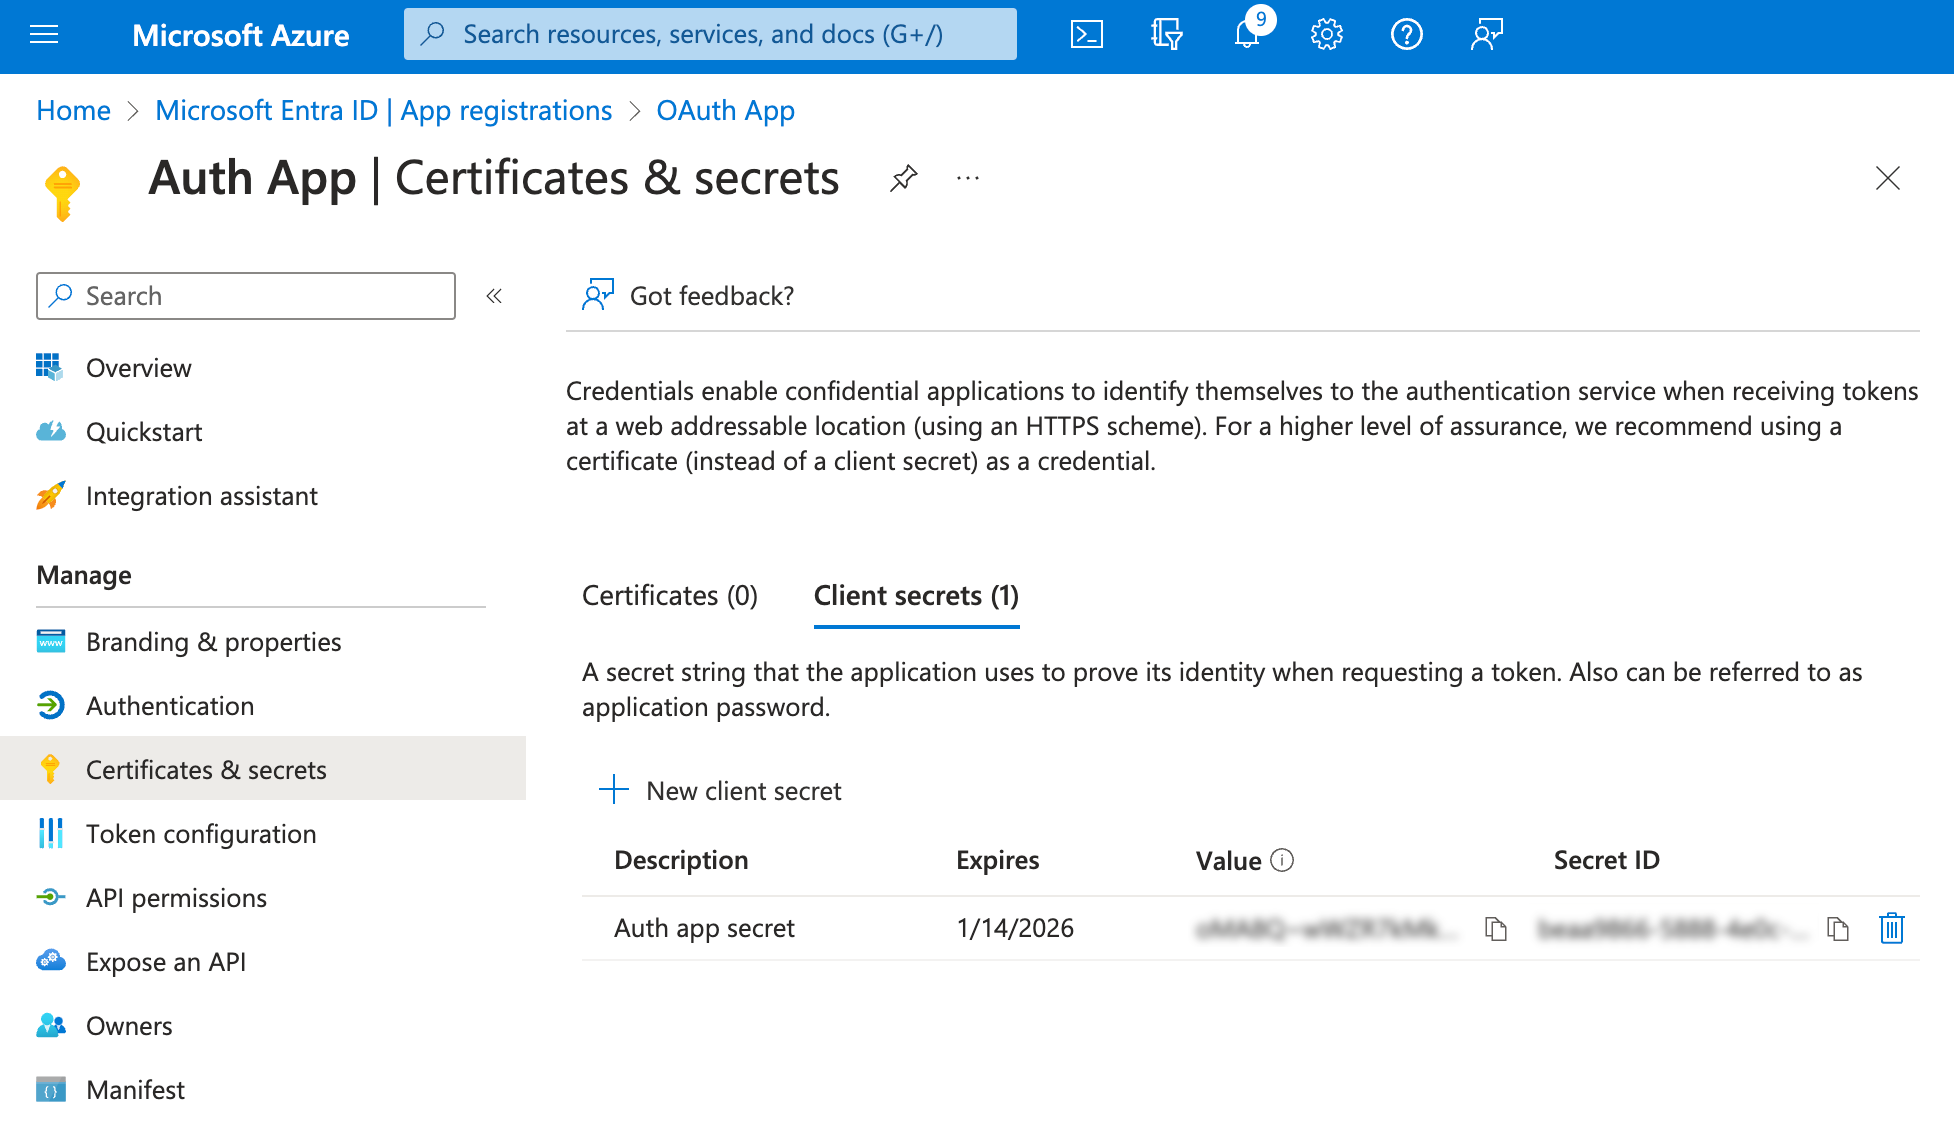
Creating OAuth Credentials
- Head to the "Certificates & secrets" panel and click "New client secret".
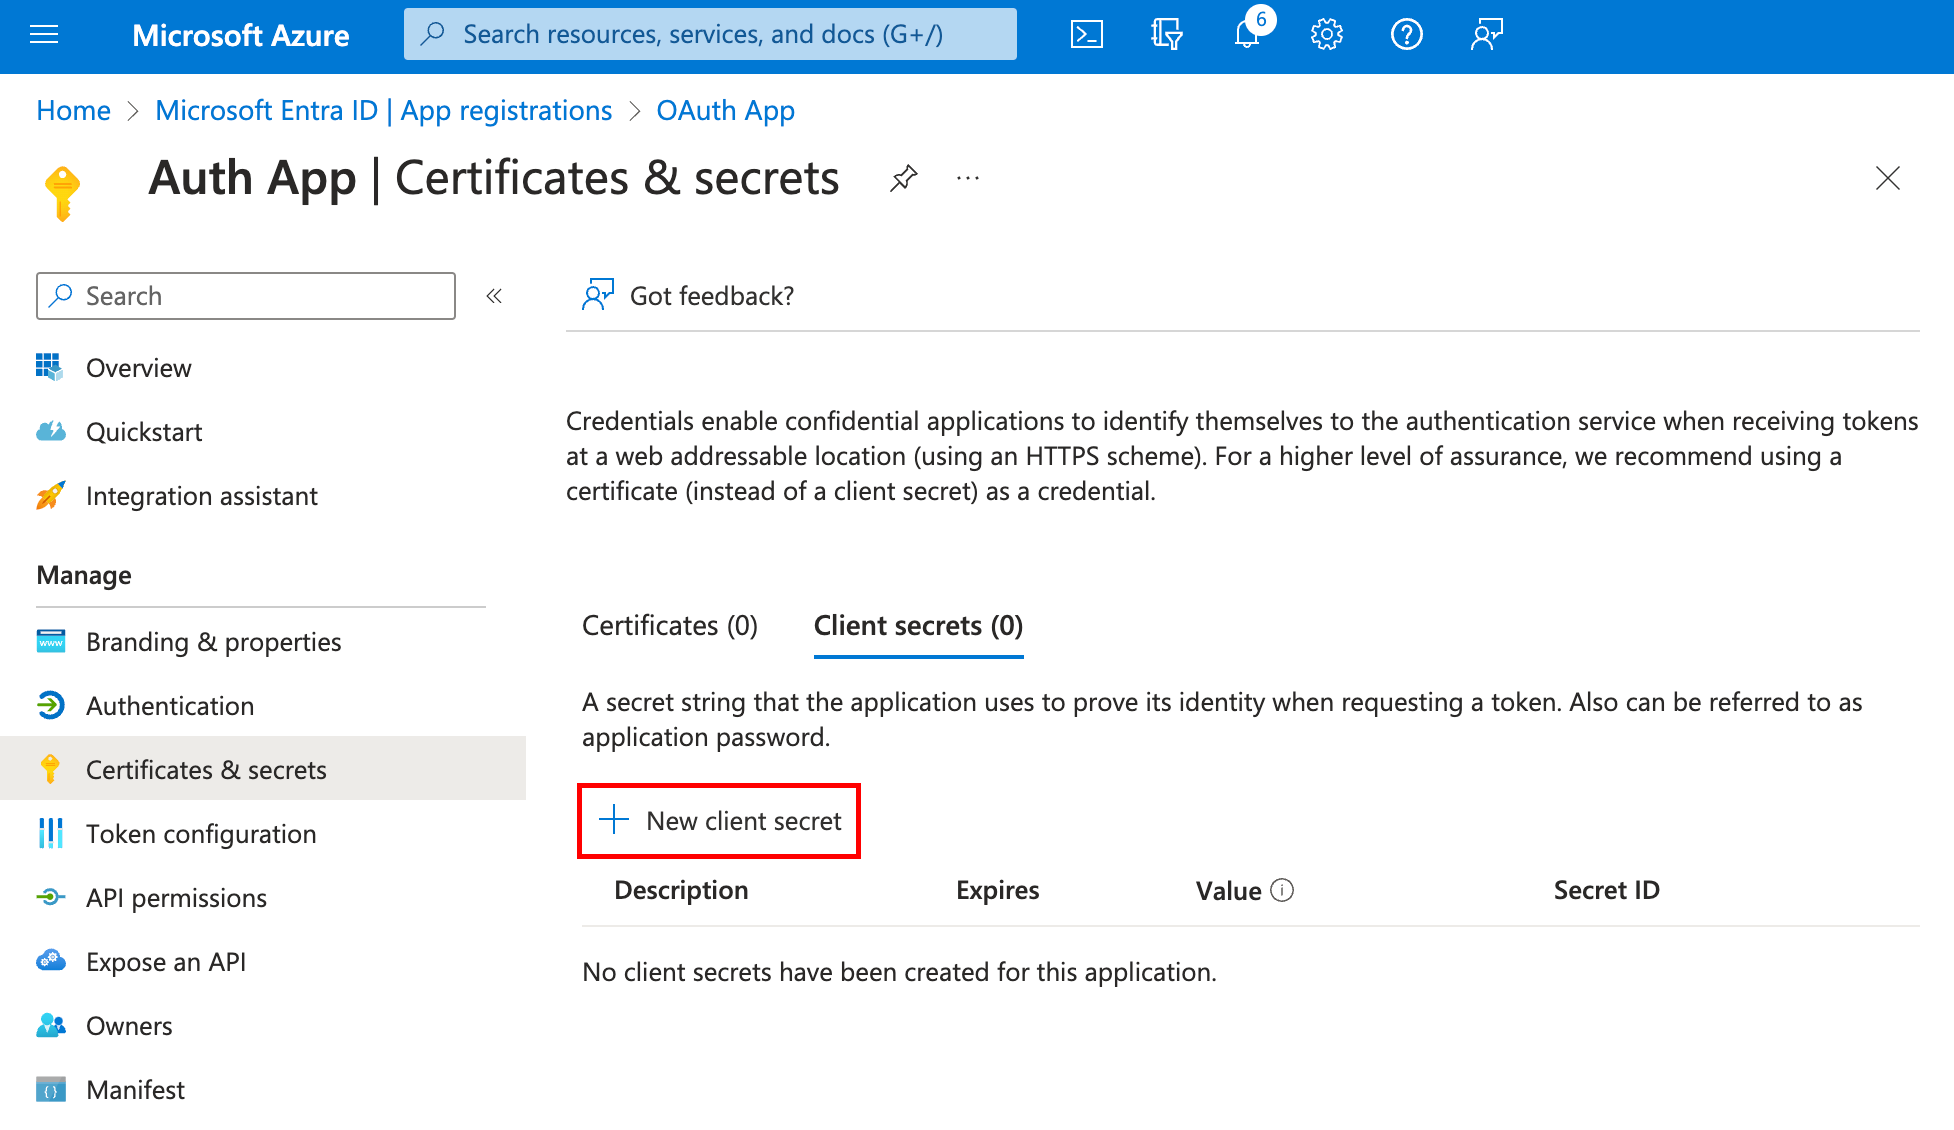
- Name the secret and set an expiration date of "730 days (24 months)", then click "Add" (note reminder on the date on your side to avoid interruption).
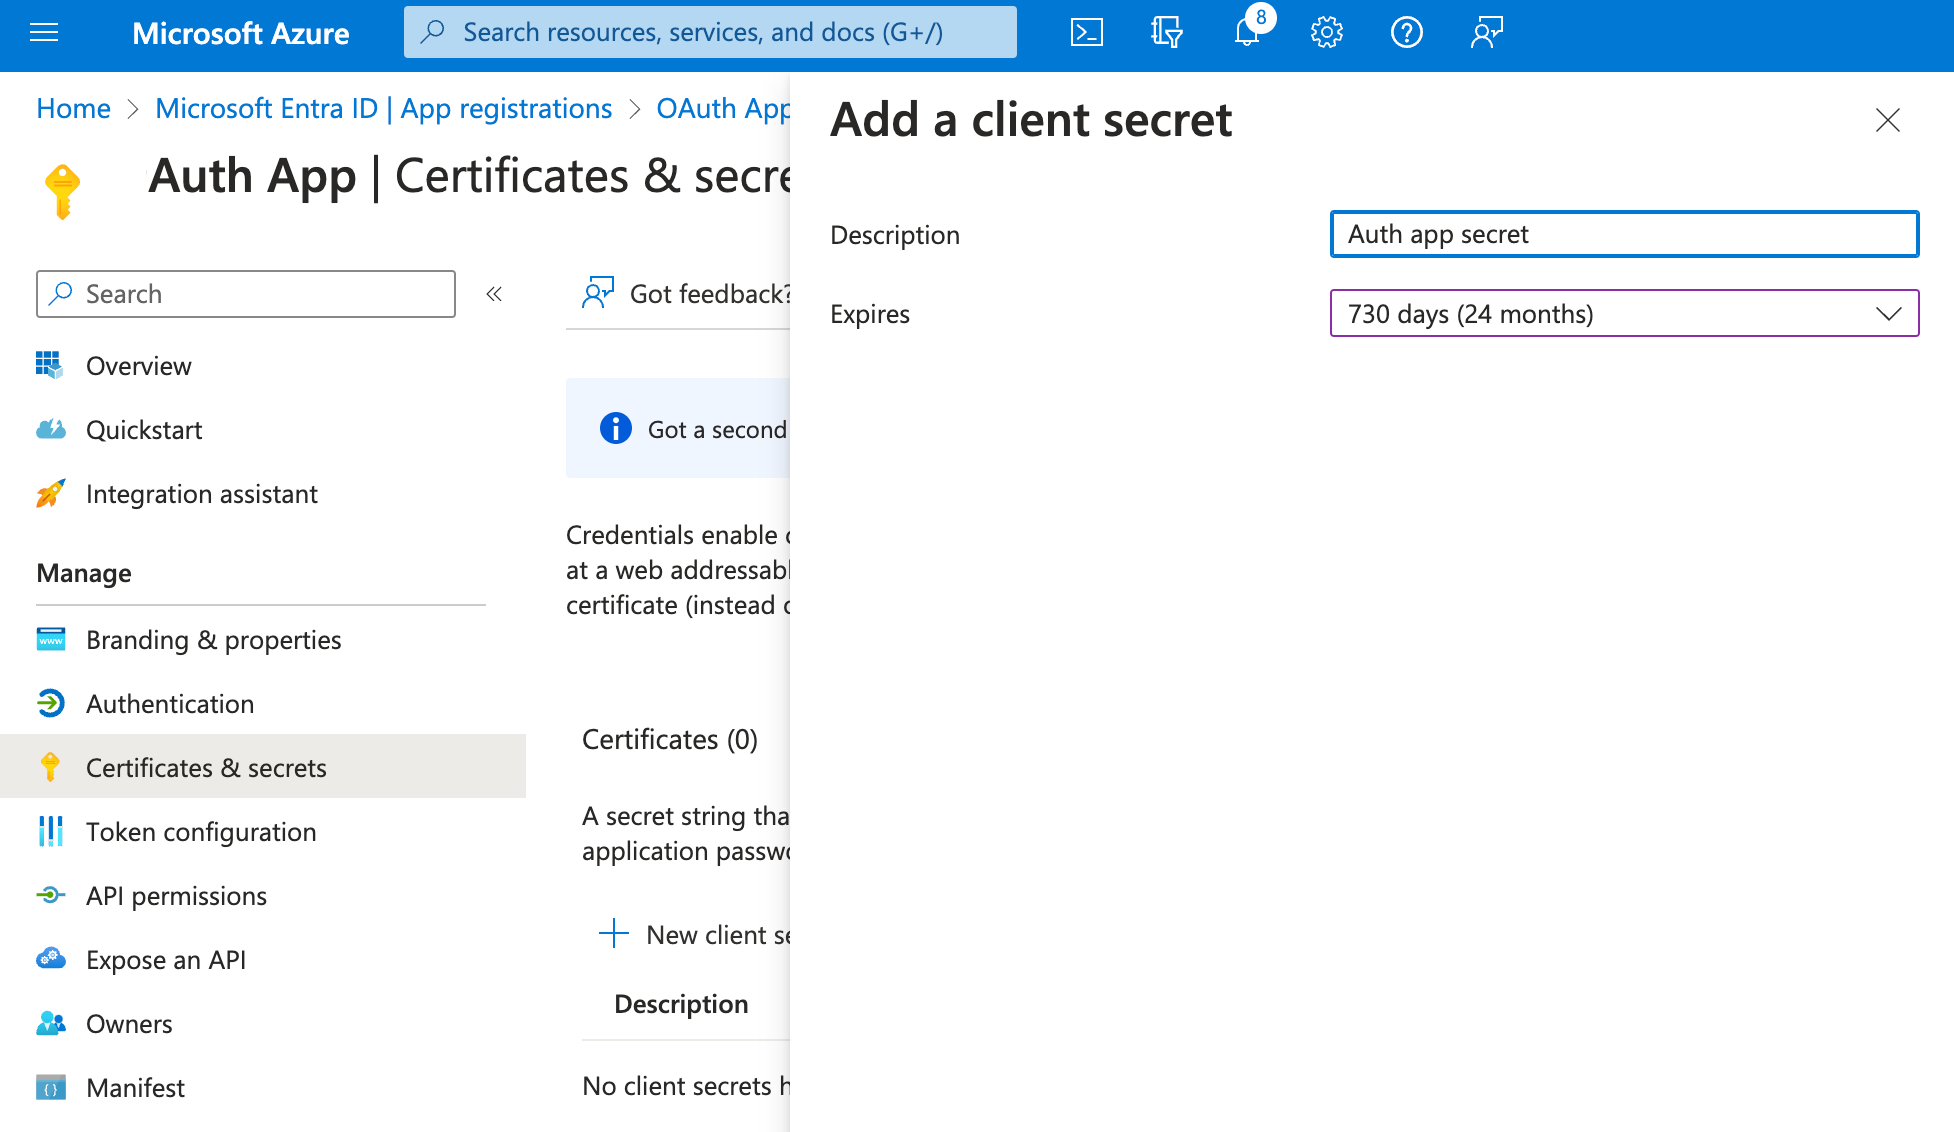
- Copy the secret (column "Value") to a safe place. You won't be able to retrieve it from this page afterward!
Configure Unipile to Use Your Microsoft OAuth Credentials
Go to the Unipile Dashboard and log in.
Choose the Settings menu, and switch to the Microsoft Oauth part.
Copy-paste the Application (Client) ID from the Overview page and the secret (value) from the Clients secrets page and click "Save".
You are now all set to start connecting Microsoft accounts to Unipile.
Becoming a Verified Publisher
With verification :
Without for professional account :
Create An Account
- Become a Verified Member of the Microsoft Partner Network (MPN): https://partner.microsoft.com/en-US/partnership
- In the first step, choose the "Partner" option, and on the next page, select "Microsoft AI Cloud Partner Program."
If you can't select "Microsoft AI Cloud Partner Program," it is because you need a work account. If your company does not have a Microsoft subscription, you need to create one by following the steps in the "To create a new tenant" section of this Microsoft tutorial: https://learn.microsoft.com/en-us/entra/fundamentals/create-new-tenant
You will need a bank card, but you can choose the option not to be invoiced (only for usage you will not use). Complete the process by creating a user on your new tenant, e.g., [email protected], and restart the partner process with this account. - Complete all your company information.
Verify Your Domain
Create a file named "microsoft-identity-association.json" and host it to your website : https:// YOUR DOMAIN .com/.well-known/microsoft-identity-association.json
  {
   "associatedApplications": [
      {
         "applicationId": "replace me with your app id (client)"
      }
   ]
  }
Click Verify and save domain.
Add your Partner Global Account (PGA) ID to your Azure App
- Find your PGA ID following these instructions : https://learn.microsoft.com/en-us/partner-center/account-structure
- From the Azure portal home page, go to "App Registrations".
- Click on your app and click "Branding & properties".
- At the bottom of the page, enter your ID and click "Save".
When all is completed a blue checkmark appears next to your publisher display name in the Publisher Verification section.
You can find more details on this page of Microsoft documentation
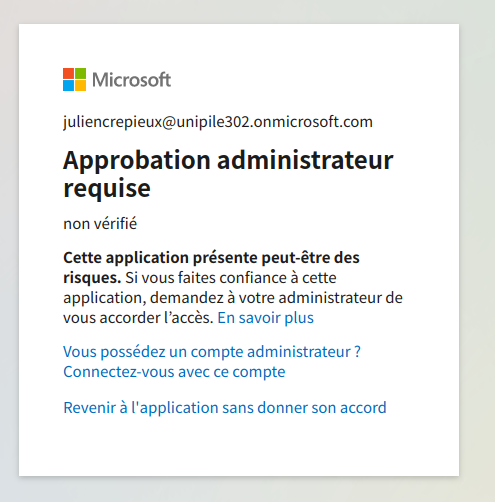
If your end user encounters the “Administrator approval required” screen
Method 1 — Approve the Admin Consent Request in Microsoft Entra (Admin Consent Requests)
If the user sees “Administrator approval required”, it means the required consent has not been granted at the tenant level.
➡️ A Microsoft administrator must review and approve the pending admin consent request in Microsoft Entra.
📌 Microsoft documentation: https://learn.microsoft.com/en-us/entra/identity/enterprise-apps/review-admin-consent-requests
Method 2 — Complete the OAuth login as an admin and grant tenant-wide consent
As an alternative, the Microsoft administrator can start the OAuth login flow directly from the customer application (where the Microsoft OAuth login is implemented).
During the Microsoft authorization step, the admin must tick the checkbox:
✅ “Consent on behalf of your organization”
This grants consent for the whole organization / all users, which prevents the “Administrator approval required” prompt for other users.
📌 Microsoft documentation (Admin consent section): https://learn.microsoft.com/en-us/troubleshoot/entra/entra-id/app-integration/troubleshoot-consent-issues#perform-admin-consent
Updated 4 months ago