Create webhook n8n
Receive data in realtime with Webhook
Step 1: Create a New Workflow in n8n
- Open the n8n dashboard
- Click on "CREATE WORKFLOW" to start a new one
Step 2: Add a Webhook Node
- In the empty workflow, click on “Add first step”
- Search for and select the “Webhook” node
Step 3: Configure the Webhook Node in Test Mode
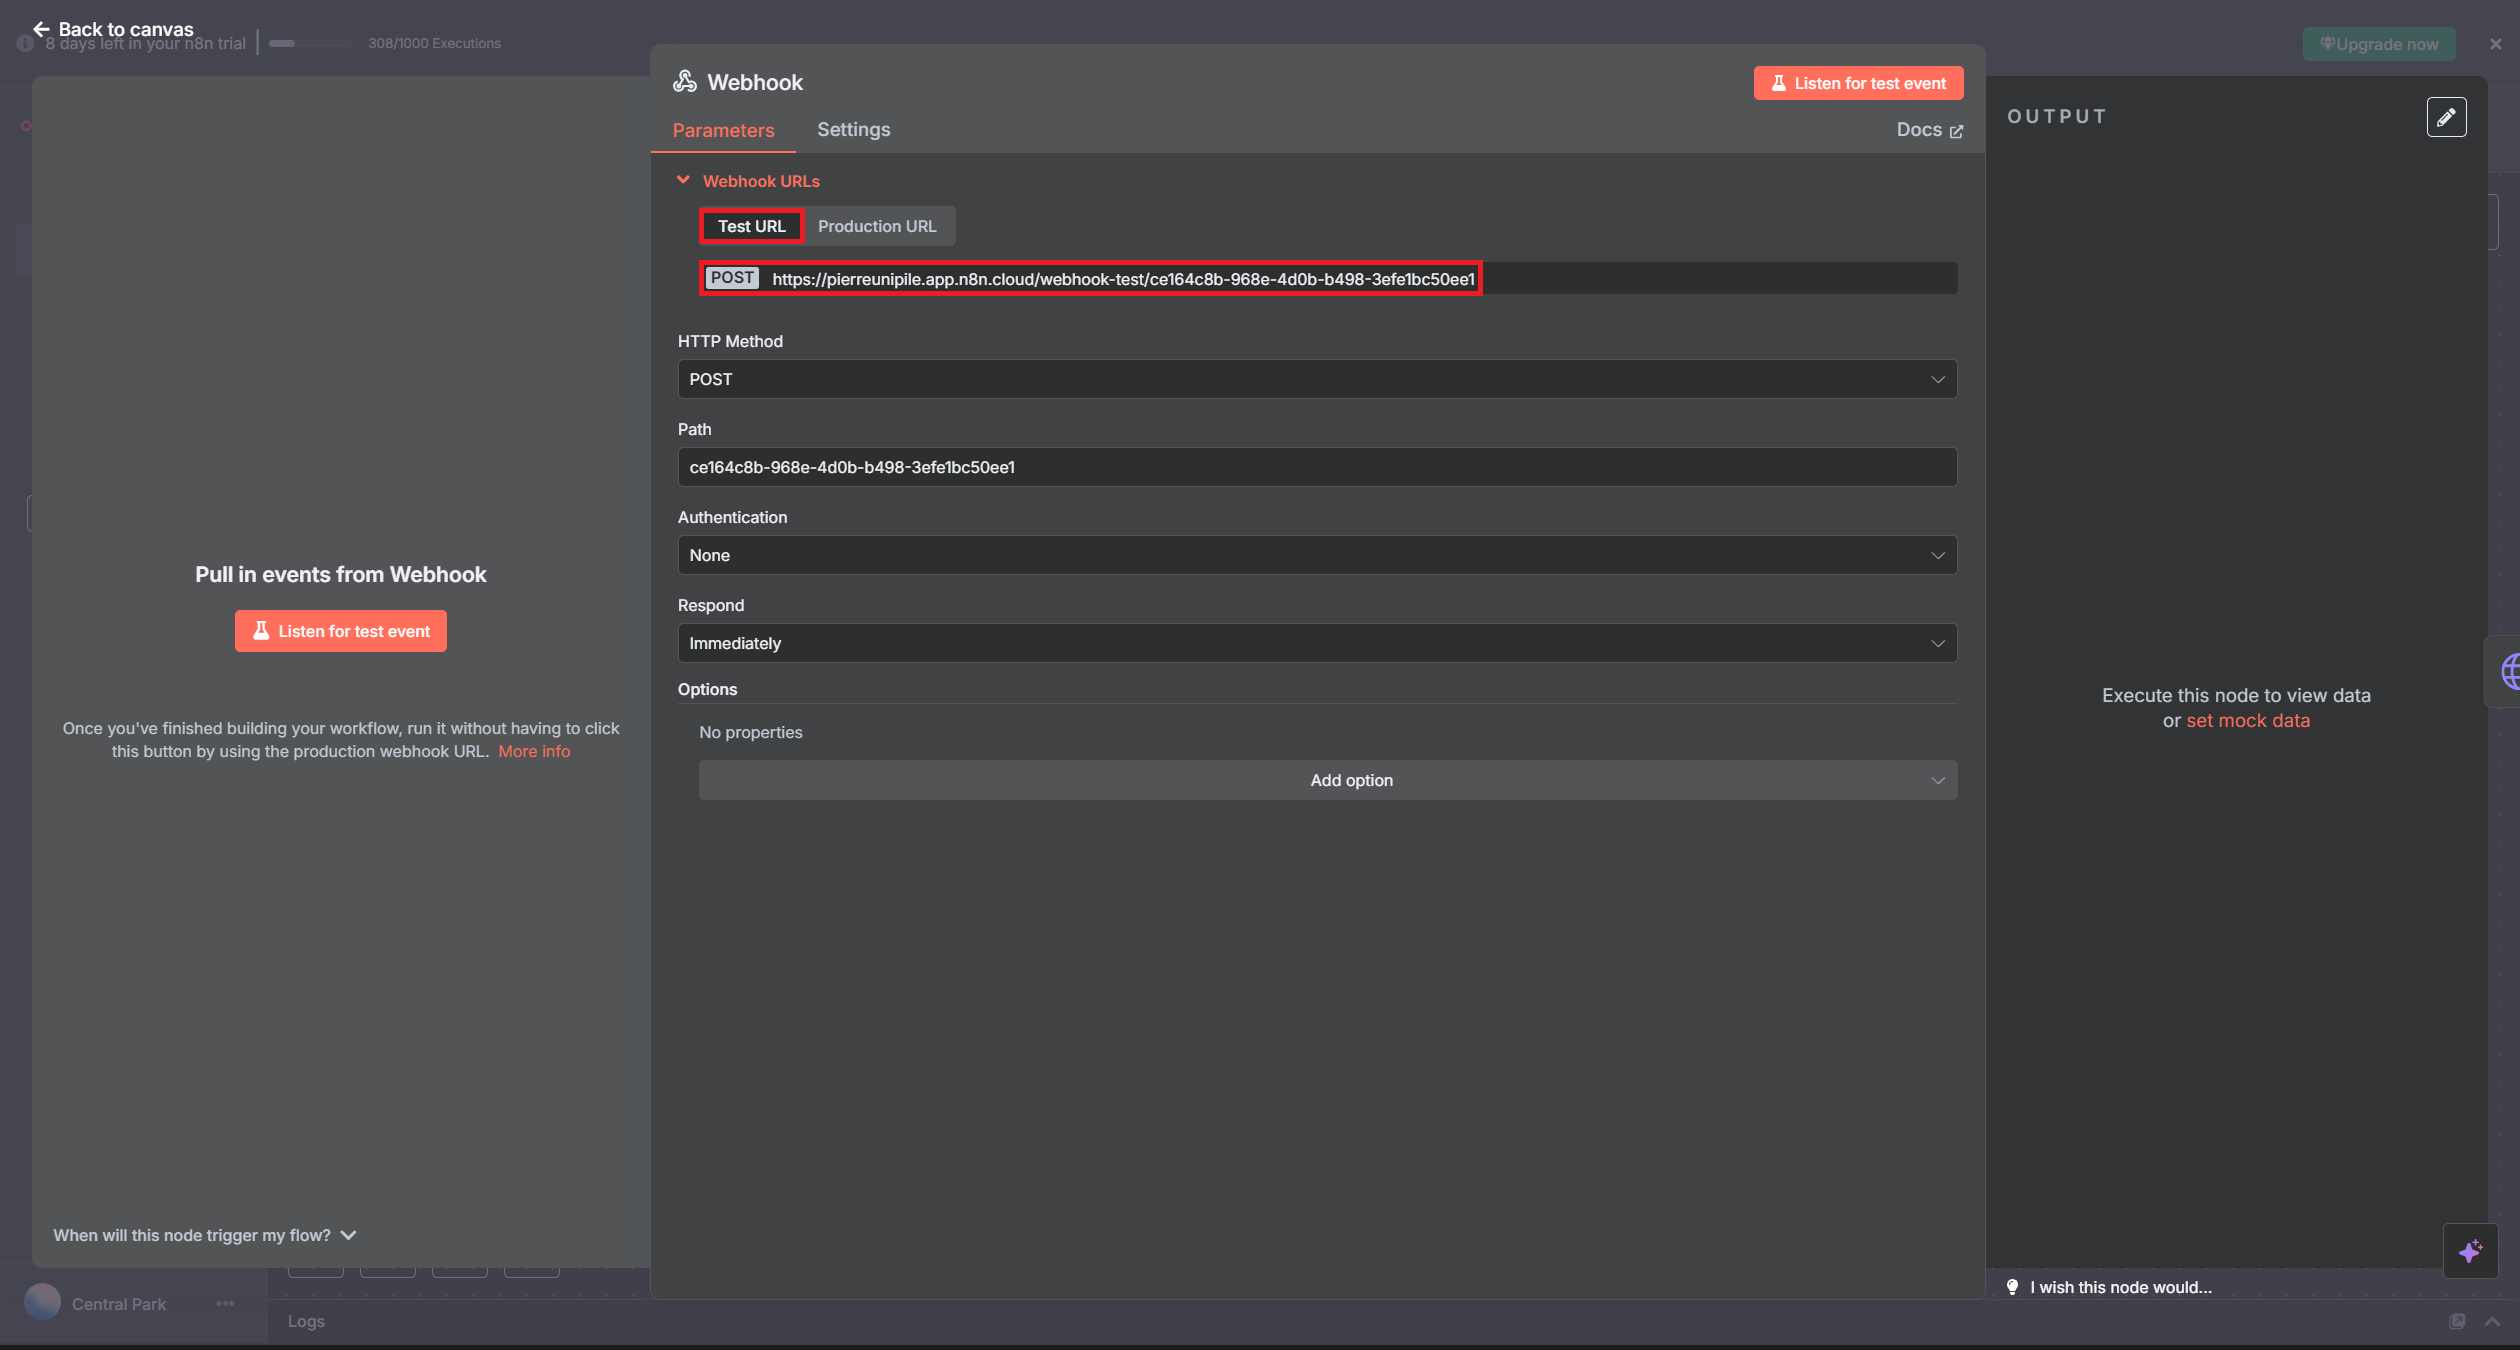
- Use the “Test URL” (shown in the node) to test incoming data.
- Copy the POST URL and keep it.
Keep the default options.
Important
This Test URL allows n8n to capture and display webhook data so you can configure the rest of your workflow (filters, API calls, automation, etc.).
DO NOT switch to the Production URL yet, or you won’t be able to inspect the incoming data or test your logic.
STEP 4: Set-Up Webhook on Unipile Dashboard
In our case, we will dedicate this webhook to received/sended messages. This webhook will only be used to configure our workflow; later on, we will need to create a new one using the production URL available on N8N.
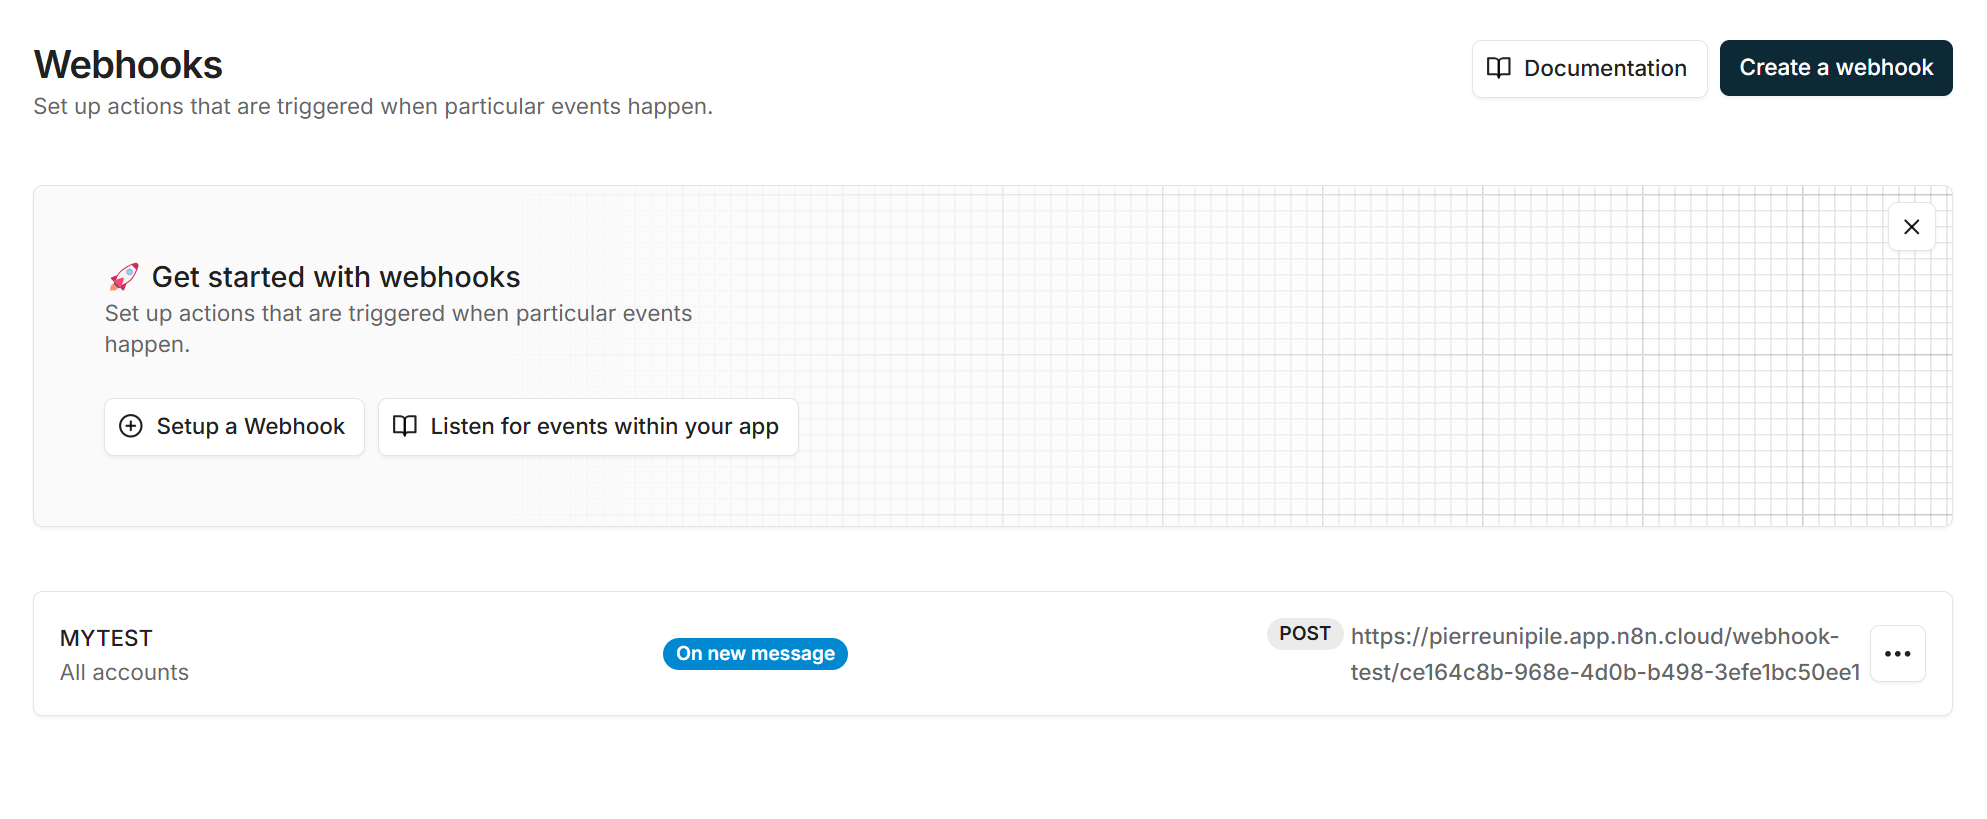
- Go to your unipile dashboard in the webhook section and create a webhook.
- Next, paste the TEST URL obtained from N8N and create a webhook
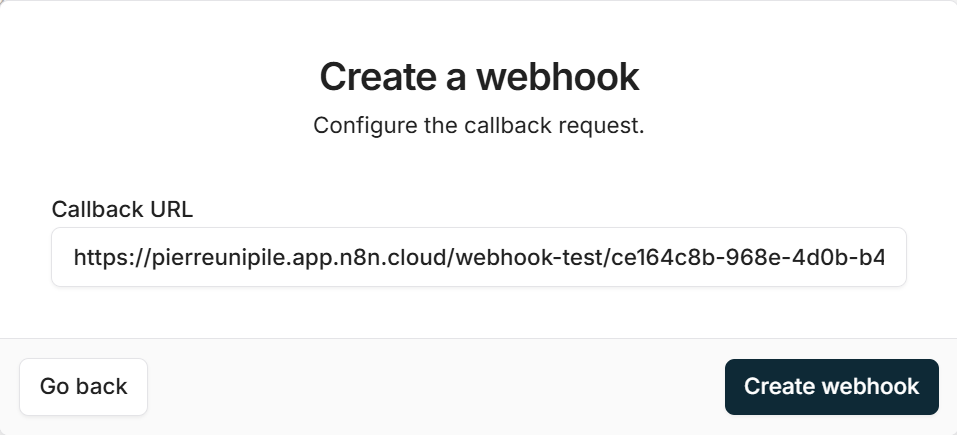
- Then, click on "Create Webhook", you should have something like that. If that's not the case, restart the previous steps :
- Go to your n8n webhook, and click on “Listen for test event”, and try to send you a message or send a message from one of your provider accounts., you should receive an output like this :
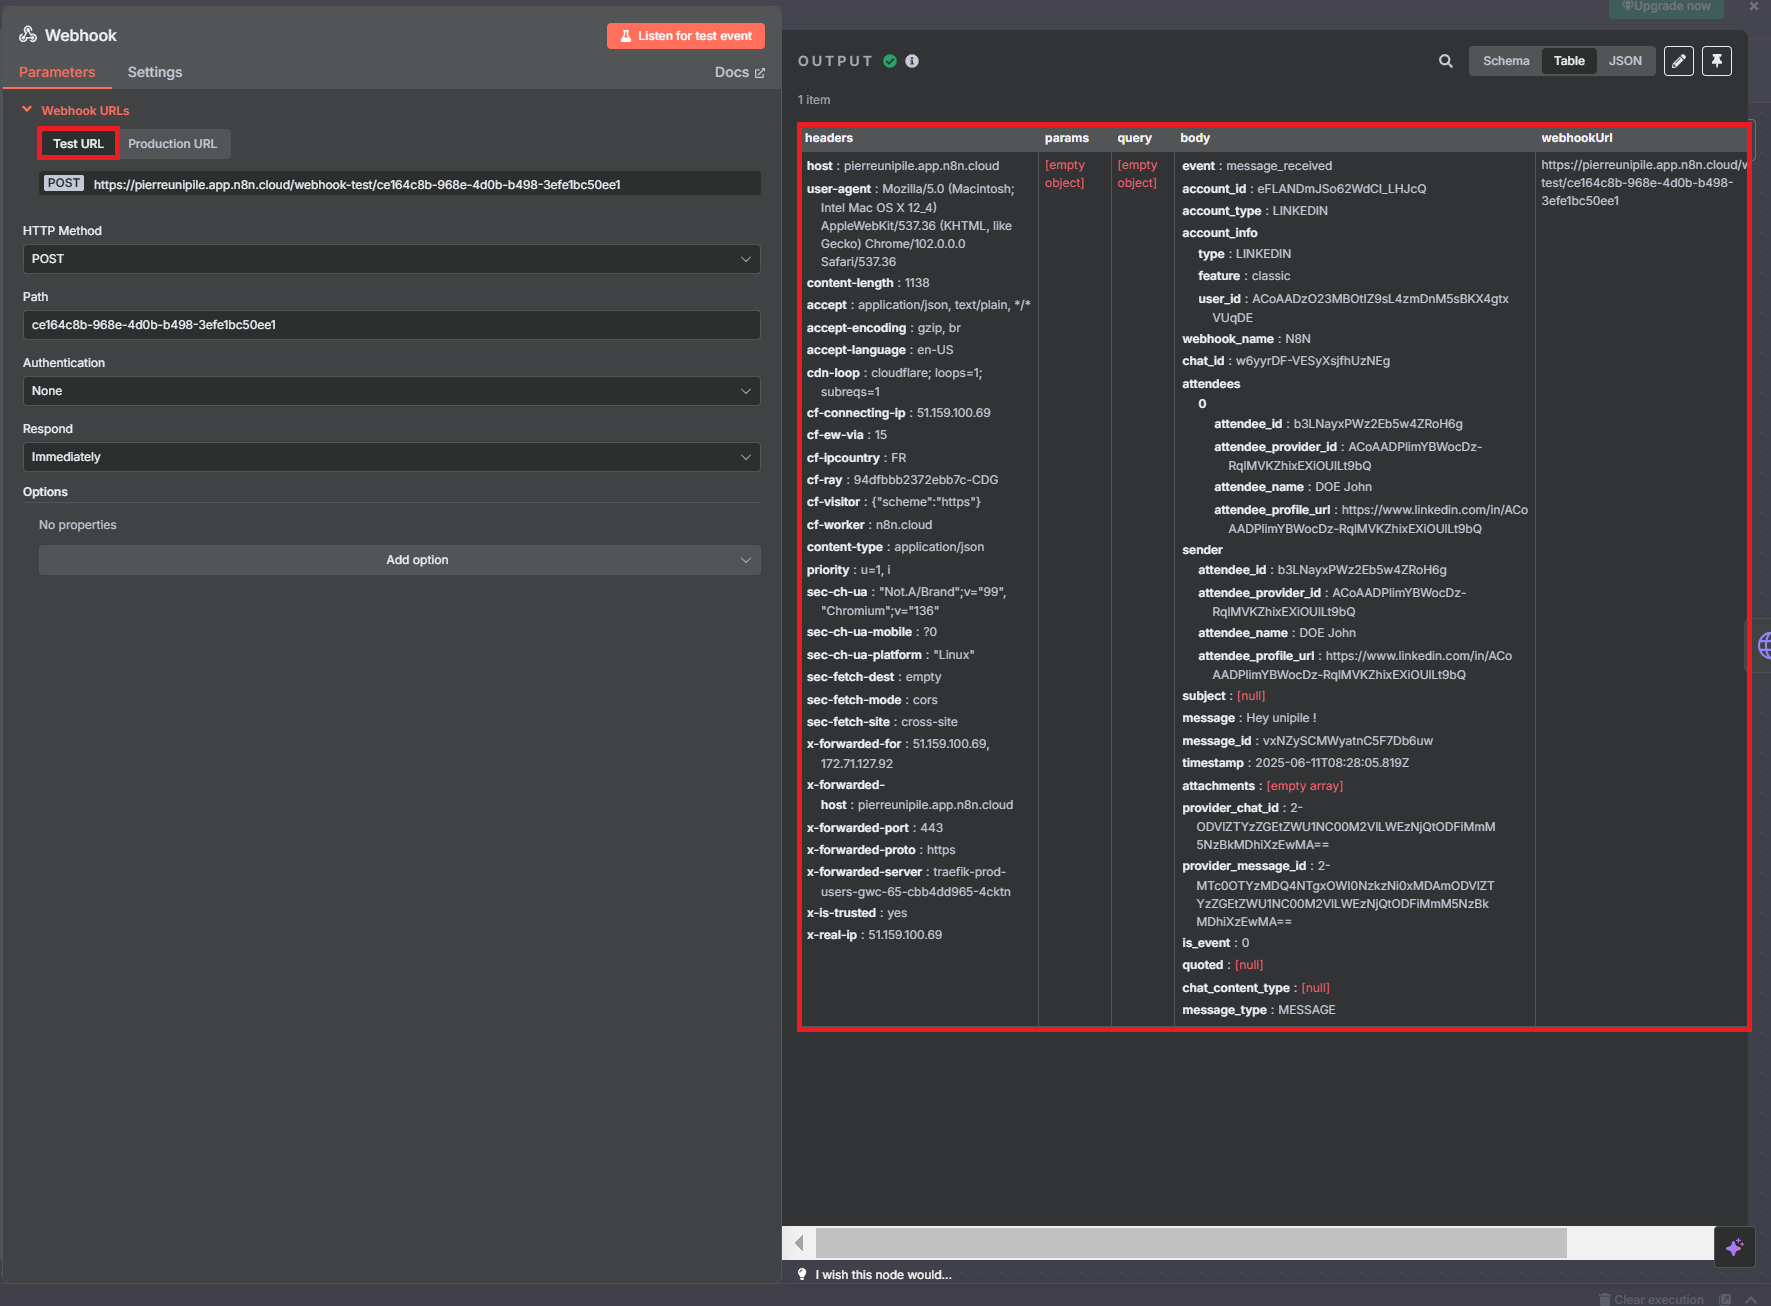
- Now it's up to you to play with the various endpoints and drag and drop the information received from the webhook into the fields of your future API request (see N8N documentation), before moving on to producing the webhook URL.
- We will now move on to the production url, click on production URL, and copy it.
- Go back to the unipile dashboard and recreate a webhook in the same way as described above , and put the production URL in the “Callback URL” field. Don't forget to activate your workflow on N8N
- Your workflow is now operational !
Updated 7 months ago
Did this page help you?