Hosted Authentication
Learn how to let your users authenticate to their accounts from your application using the Hosted Auth wizard.
To let your users authenticate to their accounts from your applications:
- Create a route that users will visit to link a new account.
- Create a callback route where your users will be redirected after their authentication.
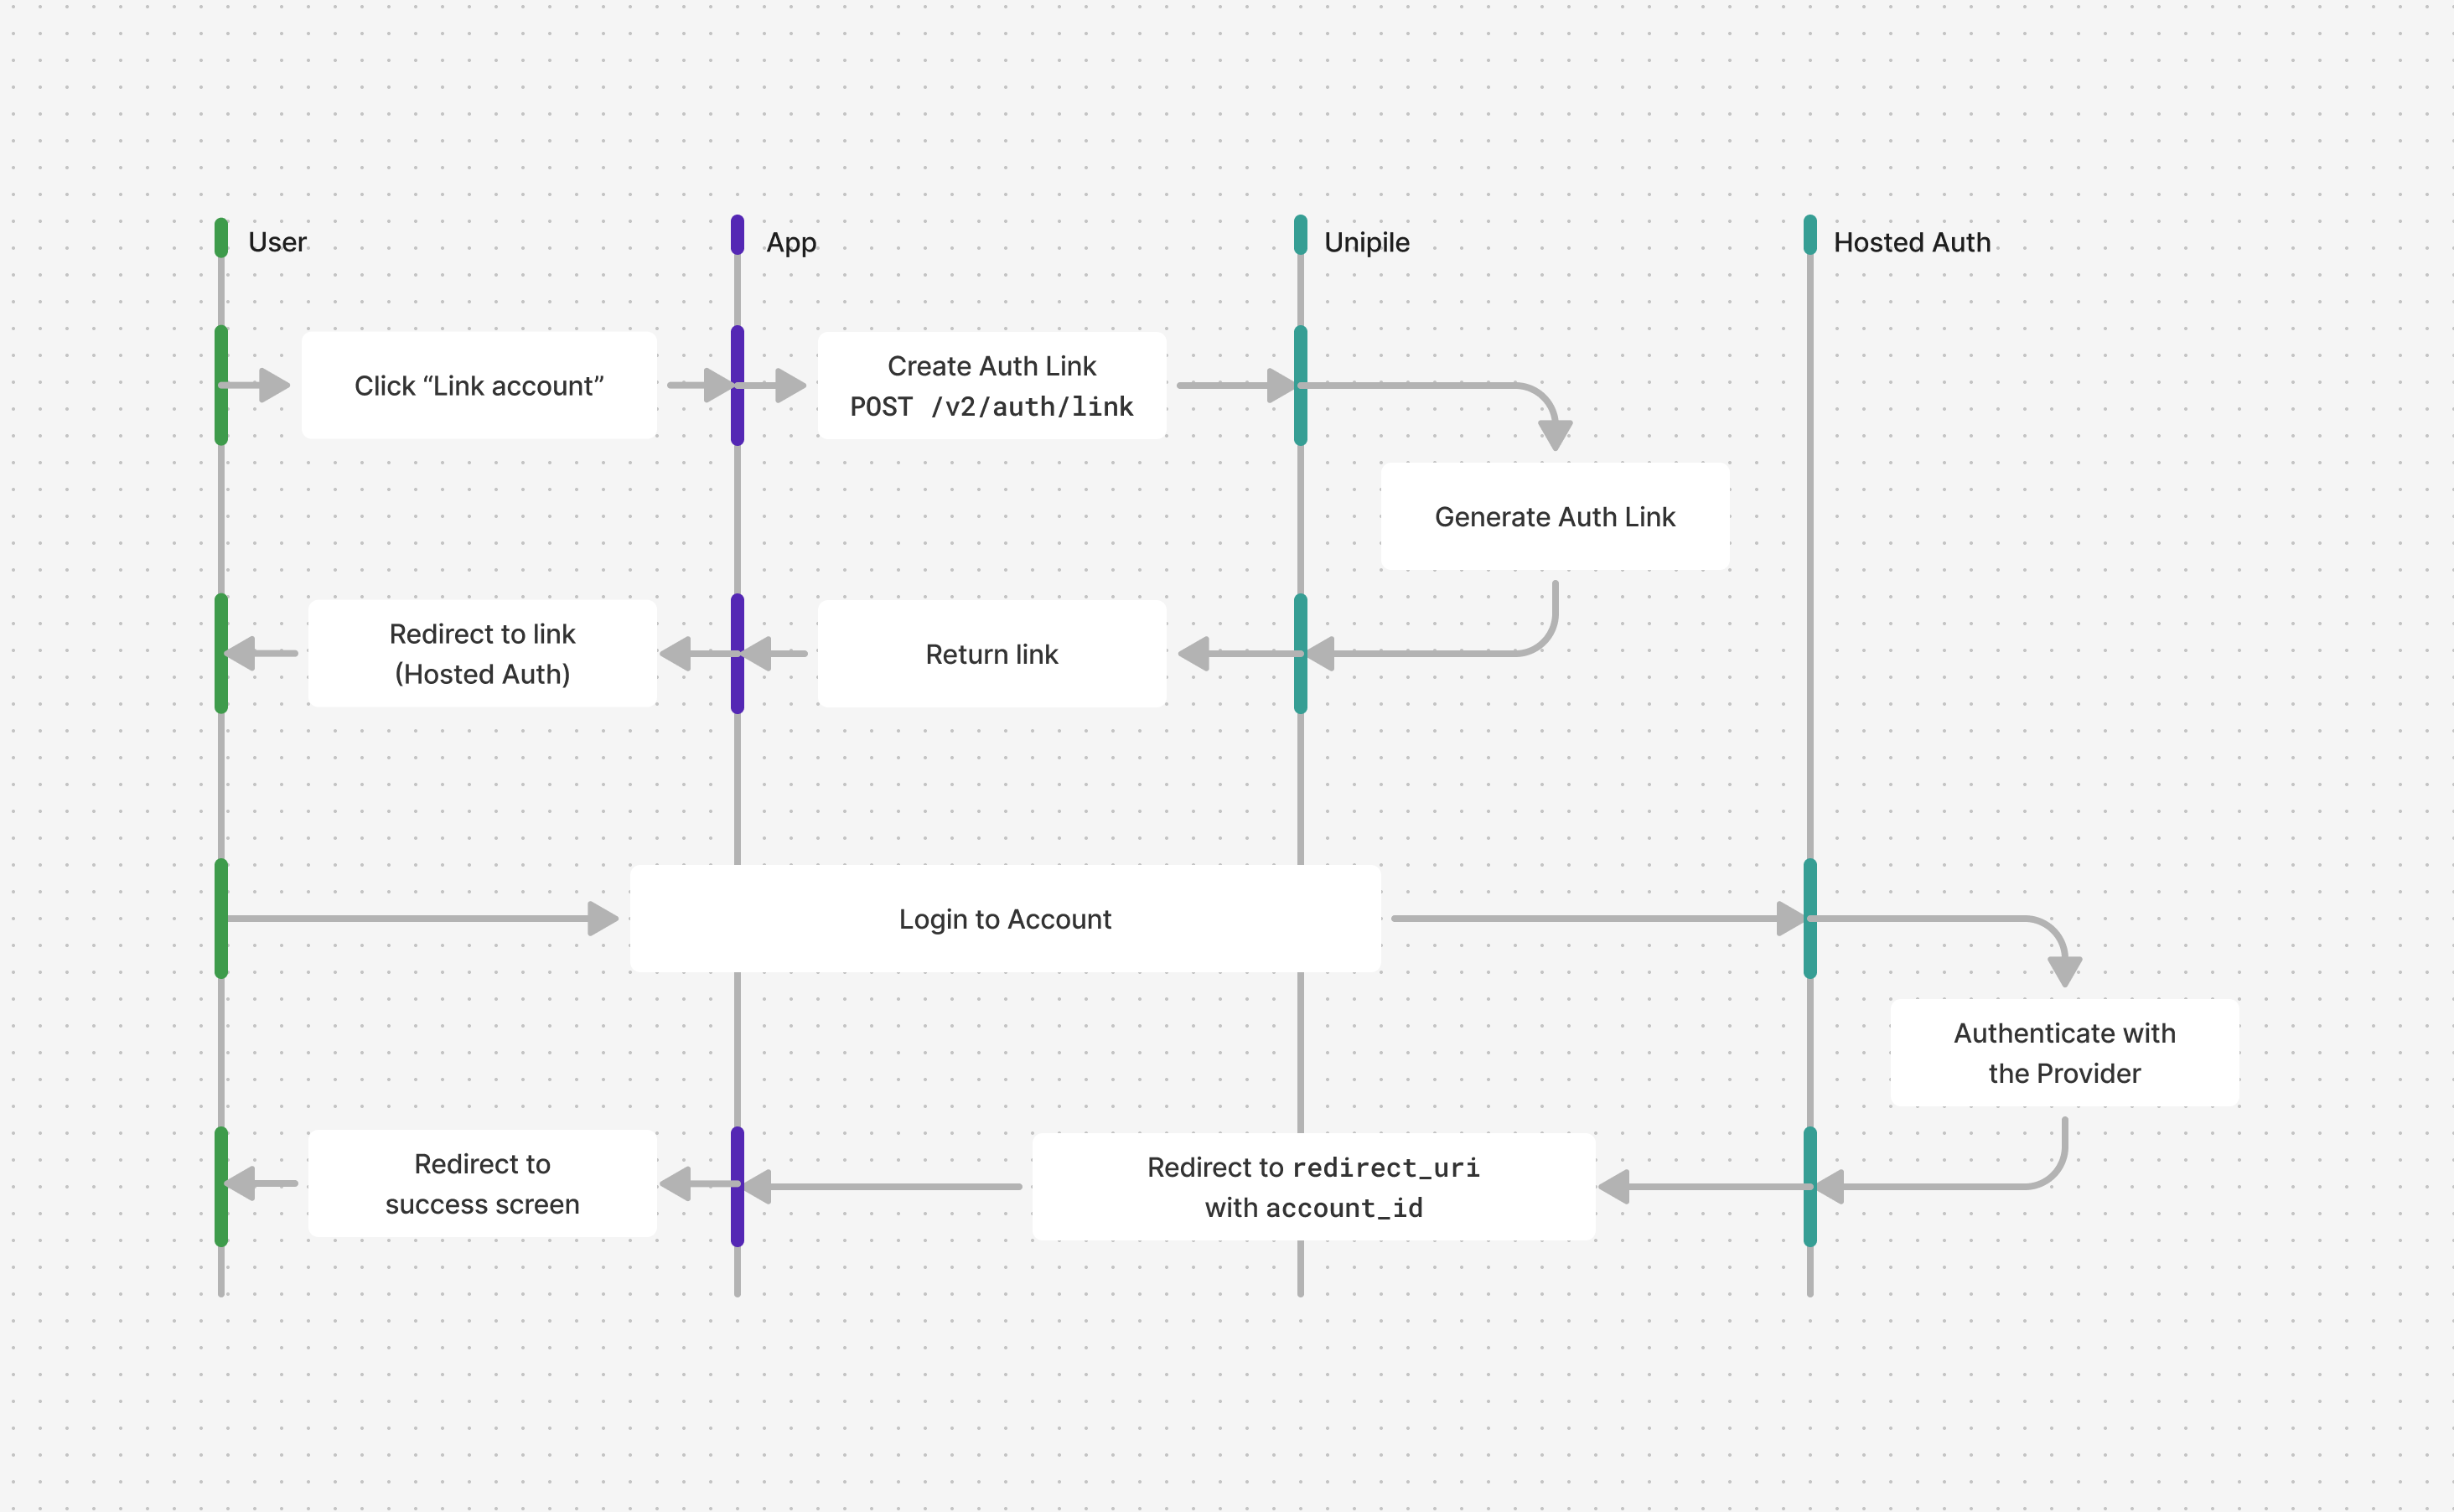
Create Auth Link and redirect
Create a new route that can accept GET requests. This is where users should go if they want to link an account. In this example:
- It Create Auth Link using Unipile SDK. The required parameters are :
- The
providersallowed to be linked. - The link session
expires_ondate (Links have a limited life time). - The
redirect_uriwhere to redirect the user after authentication.
- The
- It redirect the user to the generated URL pointing to Unipile's Hosted Auth wizard.
import { Unipile } from 'unipile';

const unipile = new Unipile('your-api-key');

// Define a route that users will visit to link an account
app.get('/link-account', async (req, res) => {

  // Generate the Hosted Auth link
  const response = await unipile
  	.hostedAuth
  	.createAuthLink({
    	providers: "*", // Allow all providers to be linked
    	expires_on: dayjs().add(10, 'minutes').toISOString(), // Make the Hosted Auth session expires after 10 minutes
    	redirect_uri: "https://myapp.com/link-account/callback", // URL of you callback route
  	});

  if (response.error) return res.status(500);

  // Redirect the user to the given Hosted Auth URL.
  res.redirect(response.data.link);
});
curl --request POST \
--url https://api.unipile.com/v2/auth/link \
--header 'X-API-KEY: api-key' \
--header 'accept: application/json' \
--header 'content-type: application/json' \
--data '
{
"providers": "*",
"redirect_uri": "https://myapp.com/link-account/callback",
"expires_on": "2025-05-05T00:00:00.000Z"
}
'Handle the callback
Create new route that can accept GET requests. This is where users will be redirected after authentication to their account. It should be the redirect_uri given to generate the auth link.
app.get('/link-account/callback', async (req, res) => {
  let q = url.parse(req.url, true).query;

  if (q.error_type) {
    console.log('Error:' + q.error_title);

    if (q.error_type === "api/already_exists") {
      // Handle duplicate accounts
      console.log("Existing account", q.error_detail) // acc_xxxxx
    }

    if (q.error_type === "api/restricted_account") {
      // Handle restricted accounts
      console.log("Reason", q.error_detail) // reason
    }

  } else {
    console.log(`${q.provider} account successfully linked`);
  }
});
Successful link
If the account was successfully linked, the following parameters are given in the query:
| key | description |
|---|---|
account_id | ID of the linked account |
provider | Provider of the linked account |
state? | (Optional) State given as parameter on link generation |
Handle errors
Errors addressed to the Account owner like "Invalid credentials" are handled and displayed inside the Hosted Auth.
But if a critical error that requires the generation of a new link occur during the authentication process, the error is given as parameters in the query:
| key | description |
|---|---|
error_type | Type of the error. See Error responses |
error_title | Title of the error |
error_detail | Detail of the error |
As mentioned in Accounts Linking Limitations, you should handle Duplicate and Restricted Accounts errors here.
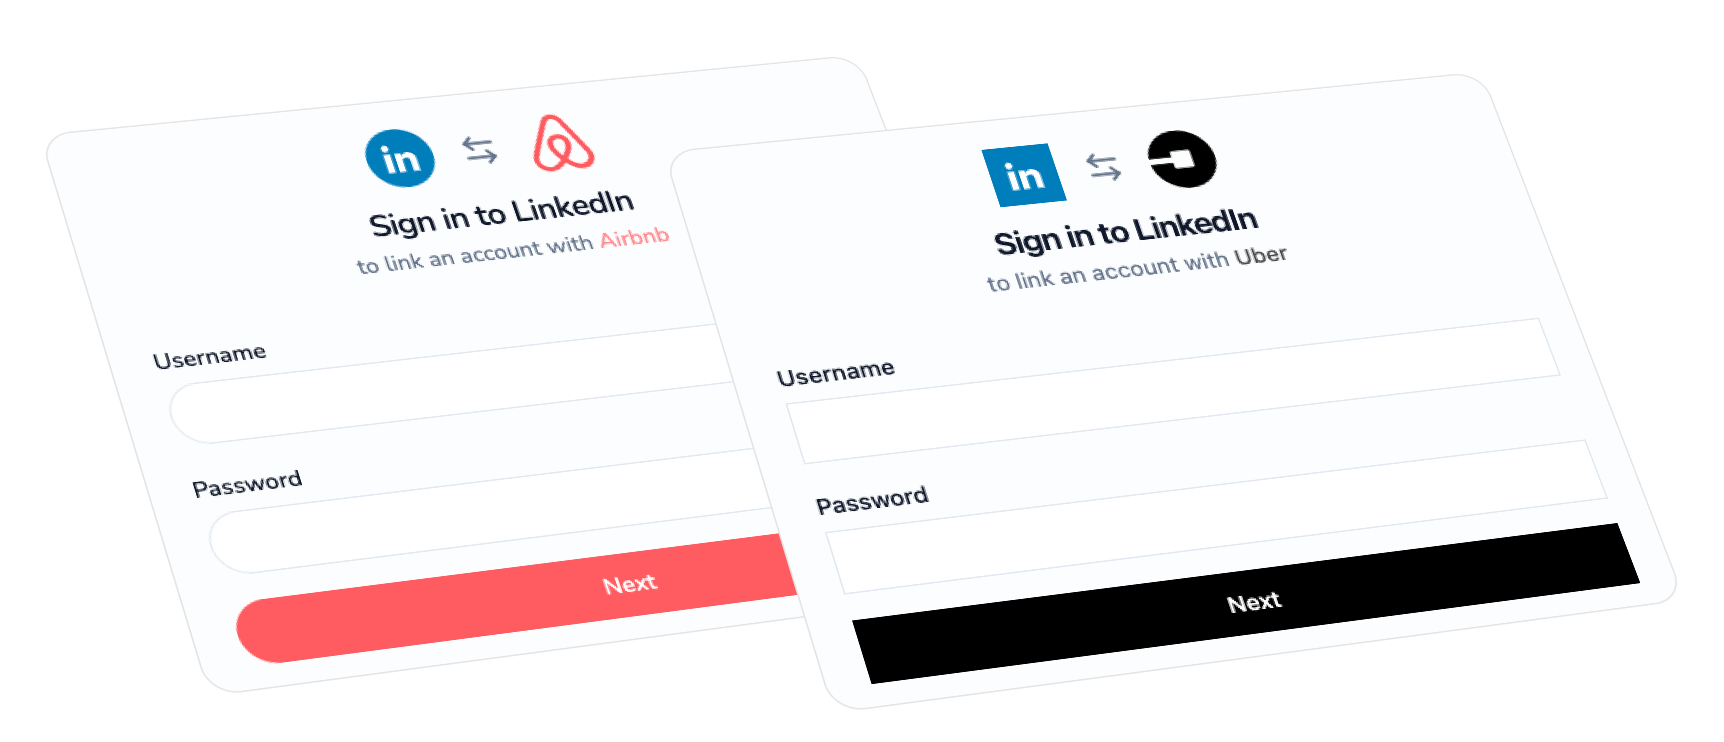
Customise appearance & branding
The Hosted Auth Wizard is pretty neutral to accommodate every app, but you can customise its appearance from the Hosted Auth tab of any Application in the Dashboard.
Configure proxy & location
You can use a custom proxy or a custom country on an automatic proxy as mentioned in the Proxy guide by giving an individual configuration for each provider. Automatic proxy protection currently applies to LinkedIn, WhatsApp, Instagram.
config.{provider}.custom_proxyto specify the configuration of a proxy to be used for accounts of the given providerconfig.{provider}.auto_proxy_configto specify the configuration of the automatic proxy assigned for accounts of the given provider, if it support automatic protection.
const response = await unipile
  .hostedAuth
  .createAuthLink({
    providers: "*",
    expires_on: dayjs().add(10, 'minutes').toISOString(),
    redirect_uri: "https://myapp.com/link-account/callback",
    config: {
      // If a google account is linked, use the given custom proxy
      google: {
        custom_proxy: {
          host: "1.1.1.1",
          port: 5100,
          protocol: "https",
        }
      }
    }
  });
curl --request POST \
--url https://api.unipile.com/v2/auth/link \
--header 'accept: application/json' \
--header 'content-type: application/json' \
--data '
{
"config": {
"google": {
"custom_proxy": {
"protocol": "https",
"host": "1.1.1.1",
"port": 5100
}
}
},
"providers": "*",
"redirect_uri": "https://myapp.com/link-account/callback",
"expires_on": "2025-05-05T00:00:00.000Z"
}
'You can also let users choose their connection location or proxy configuration directly in the Hosted Authentication flow by setting:
config.global.allow_user_proxy_override = true→ shows a proxy configuration form
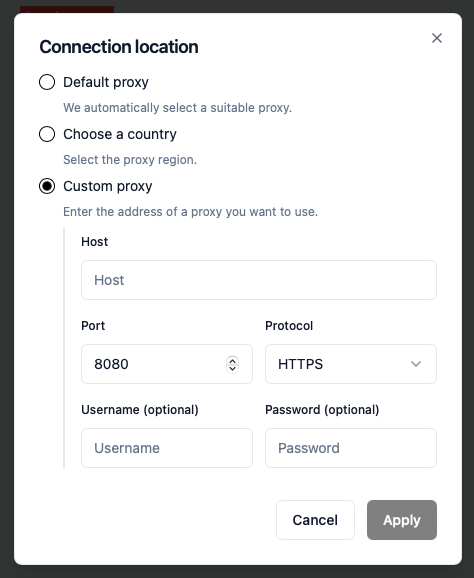
config.global.allow_user_country_override = true→ shows a country selection list for providers that use automatic proxies such as LinkedIn, WhatsApp, Instagram, Google Messages, Facebook, and X (Twitter).
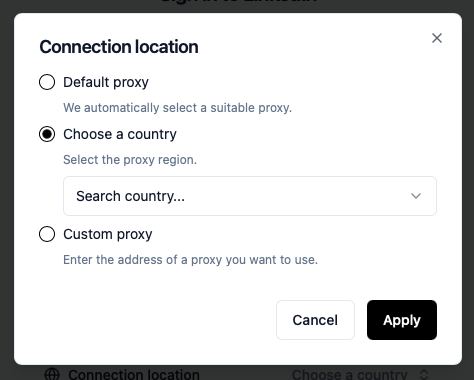
If either option is enabled, the corresponding field will appear at the bottom of authentication wizards.

Request example to generate an hosted authentication session with both options enabled:
const response = await unipile
  .hostedAuth
  .createAuthLink({
    providers: "*",
    expires_on: dayjs().add(10, 'minutes').toISOString(),
    redirect_uri: "https://myapp.com/link-account/callback",
    config: {
      global: {
        allow_user_proxy_override: true,
        allow_user_country_override: true
      },
    }
  });
curl --request POST \
--url https://api.unipile.com/v2/auth/link \
--header 'accept: application/json' \
--header 'content-type: application/json' \
--data '
{
"config": {
"global": {
"allow_user_proxy_override": true,
"allow_user_country_override": true
}
},
"providers": "*",
"redirect_uri": "https://myapp.com/link-account/callback",
"expires_on": "2025-05-05T00:00:00.000Z"
}
'For more details on custom proxies, automatic proxies, and the lookup order used to determine which proxy is applied, see our Proxy guide.
Wait for Initial sync
This section only matters for providers that support initial sync.
By default, Hosted Authentication redirects users to your application as soon as the authentication flow completes, without waiting for the Initial Sync to finish.
If your application requires complete historical data to function correctly, you have two options, as mentioned in the Initial Sync guide:
- Track the initial sync using webhooks, or
- Delay the redirection from Hosted Auth until the initial sync is completed.
To delay the redirection, set config.global.wait_for_sync to true. When enabled, users will remain on a “sync in progress” screen until the initial sync finishes.
Setup a custom domain
By default, your users will be redirected to https://auth.unipile.com. Follow this guide if you want to use your own domain instead (e.g. https://auth.yourapp.com).
1. Setup a CNAME
On your domain provider, setup a CNAME using your own URL (e.g. auth.yourapp.com) pointing to auth.unipile.com.
2. Submit your CNAME record
In the Hosted Auth tab of the Unipile Dashboard, submit your CNAME record in the Hosted auth domain section.
3. Wait for configuration & verification
Once it's done, you should see your domain in the Enabled domains list above the CNAME records field.
A domain is verified at the organization level and can be enabled across multiple applications. When a new CNAME is submitted, the domain is automatically enabled only for the current application. To use it with other applications, enable it manually in each application’s settings.
4. Generate links with custom domain
Now, when using Create Auth Link, specify domain.
const { data } = await unipileHostedAuth.createAuthLink(
  {
    body: {
      expires_on: 'value',
      redirect_uri: 'https://myapp.com/callback',
      providers: '*',
      domain: 'auth.yourapp.com'
    },
  }
);
response = hosted_auth_api.create_auth_link(
{
'expires_on': 'value',
'redirect_uri': 'https://myapp.com/callback',
'providers': '*',
'domain': 'auth.yourapp.com'
}
)Updated about 2 months ago